I have an updated version of this how-to here: “How-to: Make Your Own Cert With OpenSSL on Windows (Reloaded)“
Some people following my “Howto: Make Your Own Cert With OpenSSL” do this on Windows and some of them encounter problems. So this post shows the procedure on Windows.
If you don’t know how to use the command-line or you don’t want to install OpenSSL to create a simple certificate, I created a tool for Windows that doesn’t require installation: CreateCertGUI.
For your info: I also have a video showing this howto.
First of all, on Windows you will need to install OpenSLL from binaries. I got these binaries.
I installed the latest version (v1.0.2a) and choose the 32-bit version (Win32). I choose the 32-bit version because this will work for every Windows machine: the 32-bit version works on 32-bit and 64-bit machines.
Warning: don’t use version 1.1.0 or later, you’ll get this error: “problem creating object tsa_policy1=1.2.3.4.1”
If you start the installation and get the following message:

then you need to cancel the installation and install the Visual C++ 2008 Redistributables first. You can find download links on the same page. If you install Win32 OpenSSL (32-bit), install Visual C++ 2008 Redistributables, and if you install Win64 OpenSSL (64-bit), install Visual C++ 2008 Redistributables (x64).
The installation of the Redistributables is easy:


After this, you can restart the OpenSSL installation:


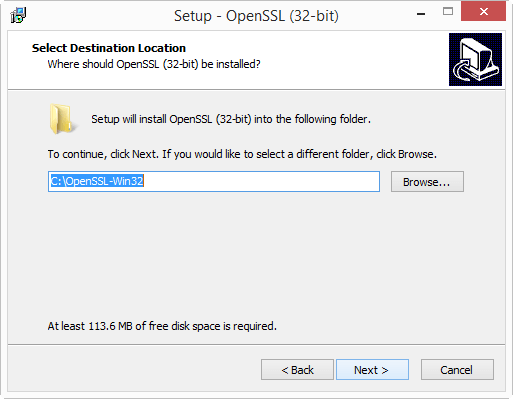
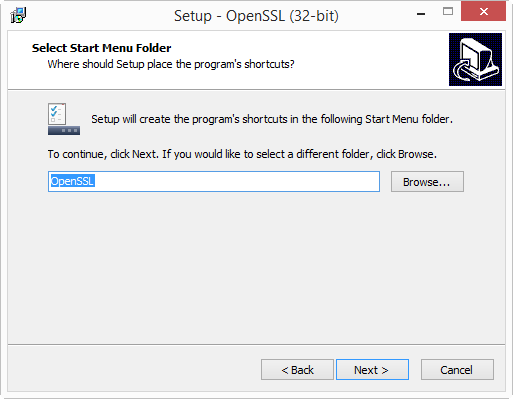


I will create the certificates in folder c:\demo. So go ahead and create this folder on your machine.
Then start a command-line prompt (cmd.exe), and go to the demo folder (type: cd \demo).
Before you start OpenSSL, you need to set 2 environment variables:
set RANDFILE=c:\demo\.rnd
set OPENSSL_CONF=C:\OpenSSL-Win32\bin\openssl.cfg

Now you can start OpenSSL, type: c:\OpenSSL-Win32\bin\openssl.exe:

And from here on, the commands are the same as for my “Howto: Make Your Own Cert With OpenSSL”.
First we generate a 4096-bit long RSA key for our root CA and store it in file ca.key:
genrsa -out ca.key 4096

If you want to password-protect this key, add option -des3.
Next, we create our self-signed root CA certificate ca.crt; you’ll need to provide an identity for your root CA:
req -new -x509 -days 1826 -key ca.key -out ca.crt

The -x509 option is used for a self-signed certificate. 1826 days gives us a cert valid for 5 years.
Next step: create our subordinate CA that will be used for the actual signing. First, generate the key:
genrsa -out ia.key 4096

Then, request a certificate for this subordinate CA:
req -new -key ia.key -out ia.csr

Make sure that the Common Name you enter here is different from the Common Name you entered previously for the root CA. If they are the same, you will get an error later on when creating the pkcs12 file.
Next step: process the request for the subordinate CA certificate and get it signed by the root CA.
x509 -req -days 730 -in ia.csr -CA ca.crt -CAkey ca.key -set_serial 01 -out ia.crt

The cert will be valid for 2 years (730 days) and I decided to choose my own serial number 01 for this cert (-set_serial 01). For the root CA, I let OpenSSL generate a random serial number.
That’s all there is to it! Of course, there are many options I didn’t use. Consult the OpenSSL documentation for more info. For example, I didn’t restrict my subordinate CA key usage to digital signatures. It can be used for anything, even making another subordinate CA. When you buy a code signing certificate, the CA company will limit its use to code signing. And I did not use passwords to protect my keys. In a production environment, you want to protect your keys with passwords.
To use this subordinate CA key for Authenticode signatures with Microsoft’s signtool, you’ll have to package the keys and certs in a PKCS12 file:
pkcs12 -export -out ia.p12 -inkey ia.key -in ia.crt -chain -CAfile ca.crt

If you did not provide a different Common Name for the root CA and the intermediate CA, then you’ll get this error:
Error self signed certificate getting chain.
error in pkcs12
To sign executables in Windows with the signtool: install file ia.p12 in your certificate store (e.g. double click it), and then use signtool /wizard to sign your PE file.
The certificates (.crt files) you created here can also be double-clicked in Windows to view/install them:


[…] Eine schöne Anleitung OpenSSL unter Windows einzurichten und sich Zertifizierungsstellen einzurichten, findet man hier: https://blog.didierstevens.com/2015/03/30/howto-make-your-own-cert-with-openssl-on-windows/ […]
Pingback by OpenSSL unter Windows einrichten | Das nie endende Chaos! — Monday 30 March 2015 @ 11:05
May I dare ask what’s this for?
set RANDFILE=c:\demo\.rnd
Seems like it disables all randomness in the keys, making the certs useless/dangerous for people who don’t pay attention where they use them.
Comment by s — Monday 30 March 2015 @ 11:18
@s From the OpenSSL documentation:
RANDFILE

    a file used to read and write random number seed information, or an EGD socket (see RAND_egd).
On Linux systems, this file is in your home folder: ~/.rnd
On Windows with the OpenSSL binaries I used, this file is in the root of the C: drive: C:\.rnd
And for normal users, that is a problem, because they don’t have write access to C:\
So if you run the openssl genrsa command without setting the RANDFILE environment variable, you get an error:
Loading ‘screen’ into random state – done
Generating RSA private key, 2048 bit long modulus
..+++
…………+++
unable to write ‘random state’
e is 65537 (0x10001)
By pointing the RANDFILE to a file where the user has read and write access, openssl can write to the file and no error is generated.
Now you mention disabling all randomness in the keys. Are you maybe referring to /dev/random? Because that is not where RANDFILE points to.
Comment by Didier Stevens — Monday 30 March 2015 @ 14:52
thank you . It is worked…
Comment by kandege — Sunday 21 June 2015 @ 18:48
How to add a OID to certificate?
I tried add this line in openssl.cfg:
[ new_oids ]
EKU_PKIX_CODESIGNING = 1.3.6.1.5.5.7.3.3
But after install “ca.crt” as trusted root and make “ia.crt”, I dont see ia.crt have above OID.
Comment by Zxz — Wednesday 24 June 2015 @ 10:19
Please help, I can send encrypted and signed e-mails from Thunderbird and Outlook eMail Client. I can also decrypt and verify the emails.
The problem is that on iOS I can’t enable assign my certificates. In settings->e-mail->(account)->S/MIME, I cannot found my certificates.
All certificates, both CA and the S/MIME cert with its key, have been imported to the iOS from sending to my own email.
Thanks in advance
Comment by Anonymous — Wednesday 22 July 2015 @ 13:36
Hello, thank for the tutorial. It’s work. But, my problem is how can I configure this certificate or SSL certificate in my localhost web server? I already install Xammp and upload my web sistem in localhost. Now I want to add this SSL certificate or enabled this SSL certificate in my web server. Could you give me an advice? thanks a lot 🙂
Comment by Kadek Restu Yani — Friday 7 August 2015 @ 7:02
Is this Apache? Then edit ssl.conf.
Comment by Didier Stevens — Friday 7 August 2015 @ 18:29
Hi, this is great tutorial. thank you. but I have a problem when I wan to enable this certificate to my local web server. I using apache (xampp). I still confuse with Common Name?? what should I type?? Localhost or other? please help me? I want use my own certificate in my local web server to enable Https access. thank a lot 🙂
Comment by Kadek Restu Yani — Tuesday 11 August 2015 @ 8:22
What URL do you use to connect to your server?
Comment by Didier Stevens — Tuesday 11 August 2015 @ 19:27
Hi Didier Stevens, I am late to respon your comment.. I trying to solve the problem but not use. I store my web in localhost web server. Usually when I access I just use localhost/vidyanusa (it’s mean vidyanusa is my folder website which I put on htdocs path). I just want to enable SSL or Https in green Bar, when I access like https://localhost/vidyanusa . Is possible if I follow your tutorial to create my own certificate and I use to enable SSL?? I am sorry, I am new comer to learn SSL. Thank you for helping me :).
Comment by Kadek Restu Yani — Wednesday 12 August 2015 @ 10:32
And one more, Is possible if for the first step: our self-signed root CA certificate I will put the Common Name is my local IP computer and the second for request a certificate for this subordinate CA, I will use Common Name: localhost. According to me, Is it right the second Common Name will use when we want to access URL web? I haven’t domain web, because my web still in localhost. such as: localhost/vidyanusa. I really need your advice, because this is my task for implementing paper :). I hope you can help me :).
Comment by Kadek Restu Yani — Wednesday 12 August 2015 @ 10:42
This is for a school assignment? Then don’t use my method to create a SSL cert, it’s too complex for your need. Google for another method to create a self-signed cert without CA & IA.
Comment by Didier Stevens — Wednesday 12 August 2015 @ 20:26
Hello, thanks for documenting this process. It demystified a great deal for me. However, since i am such a newb, i have 2 (probably very basic) questions: 1) How do i create a wildcard cert, to be used to secure multiple test websites using the same domain on a server that *is* accessible from the internet? and 2) once the cert is created, how do i ‘install’ or ‘import’ it so i can select it while editing web site bindings?
Comment by Jake — Tuesday 15 September 2015 @ 20:43
@Jake
1) use * in the Common Name, like this *.example.com
2) that’s very dependent upon the server and configuration system (like a panel) you have, you’ll have to search with Google for instructions, or ask your hosting company.
Comment by Didier Stevens — Tuesday 15 September 2015 @ 20:57
Hello Didier, i was able to add the cert to the trusted root certificate store in windows 2012; and then use the new cert in website bindings. now i get an certificate error when i browse to the sites.
‘this certificate cannot be verified up to a trusted certification authority’
Comment by Jake — Wednesday 16 September 2015 @ 18:38
@Jake You are doing this from another computer than the Windows 2012 box? Then you need to install the root CA on that computer.
Comment by Didier Stevens — Wednesday 16 September 2015 @ 18:52
Hi Didier, the ca and ia cert creation and the iis web server are on the same windows 2012 box. after installing them i see both certs in the mmc console [certificates\trusted root certification authorities>certificates]; but still get the error when i browse to the site from my workstation in IE 11.
if i view the certificate in IE 11, i can install it in the browser. but i still get the error.
Questions:
can a self signed cert ever be ‘verified up to a trusted certification authority’?
if windows is checking a list of CA’s with some higher power, can i turn off the check and just tell windows to trust the cert?
Comment by Jake — Wednesday 16 September 2015 @ 19:11
Yes, you need to install the CA cert on the workstation.
Comment by Didier Stevens — Wednesday 16 September 2015 @ 19:18
[…] Die beste Beschreibung dazu findet Ihr hier […]
Pingback by SSL Verschlüsselung zwischen Access und MySQL via ODBC | MS-Access und MySQL — Sunday 11 October 2015 @ 16:26
How can you add a crl to the certificate ?
I would like to use this to create server authentication certificates for windows 2012 server, and do not have the possibility to login as domain admin and create the certificates that way.
Now every time I login to the remote server i get the message that the crl cannot be found.
Comment by Tom Heitbrink — Wednesday 21 October 2015 @ 19:13
@Tom Search through my blogposts, I have one where I explain how to add a crl.
Comment by Didier Stevens — Wednesday 21 October 2015 @ 20:16
req -new -key ia.key -out ia.csr <== when I run this statement, I get
Error opening Private Key ia.key
1244:error:02001002:system library:fopen:No such file or directory:.\crypto\bio\bss_file.c:391:fopen('ia.key,'rb')
1244:error:20074002:BIO routines:FILE_CTRL:system lib:.\crypto\bio\bss_file.c:393:
unable to load Private Key
err in req
Comment by Dan — Wednesday 4 November 2015 @ 16:42
@Dan and what is the output of the previous command?
Comment by Didier Stevens — Wednesday 4 November 2015 @ 18:39
Hi Didier – while trying to run this command
ecparam -name secp521r1 -genkey -param_enc explicit -out private-key.pem
req -new -x509 -key private-key.pem -out server.pem -days 730
and afterwards I try to enter country code.
I am getting this error – “string is too long, it needs to be less than 2 bytes long”
Comment by Amit — Monday 23 November 2015 @ 19:18
@Amit And what country code are you typing?
Comment by Didier Stevens — Monday 23 November 2015 @ 19:29
I am trying US.
Comment by Amit — Tuesday 1 December 2015 @ 21:16
@Amit with a dot (.)?
Comment by Didier Stevens — Wednesday 2 December 2015 @ 7:04
Only US
Comment by Amit — Wednesday 2 December 2015 @ 16:50
Tutorials like this are always very usefull. Generation process is similar like on linux machine but I couldn’t remember how to install new certificate on Windows. Thanks.
Comment by rasp — Thursday 3 December 2015 @ 10:50
@Didier appreciate your few seconds on my query, need to find an answer. I have tried multiple times, but tool fails to move further from country code.
Comment by Amit — Thursday 3 December 2015 @ 20:57
@Didier looking forward to hear from you on country code issue. Appreciate your time. Thanks in advance.
Comment by Amit — Thursday 3 December 2015 @ 22:03
@Amit And you did not edit your config file? Are countryName_min and countryName_max = 2?
Comment by Didier Stevens — Thursday 3 December 2015 @ 22:51
@Didier – config file has preset value = 2
[ req_distinguished_name ]
countryName = Country Name (2 letter code)
countryName_default = AU
countryName_min = 2
countryName_max = 2
Comment by Amit — Friday 4 December 2015 @ 14:24
@Amit This is all normal. What happens when you don’t type a country code, but press RETURN to accept the default country code (AU)?
Comment by Didier Stevens — Saturday 12 December 2015 @ 19:12
Hi Didier,
Can you tell me how to produce these files in .p7b format? Would it work to just change all the .crt to .p7b?
Comment by joe — Monday 21 December 2015 @ 21:43
@joe You need to convert them, take a look here: https://support.globalsign.com/customer/portal/articles/1353601-converting-certificates—openssl
Comment by Didier Stevens — Tuesday 22 December 2015 @ 11:06
to reply to comment 37, i tried using the command openssl crl2pkcs7 -nocrl -certfile certificate.cer -out certificate.p7b -certfile CACert.cer
The problem is that i keep gettng an error. For one, your tutorial produces certs and keys in .crt. so in order to produce them in i changed the above command to openssl crl2pkcs7 -nocrl -certfile certificate.crt -out certificate.p7b -certfile CACert.crt
but that didnt work, presumably because the file names your tutorial produce are ia.crt. So i tried the command with openssl crl2pkcs7 -nocrl -certfile ia.crt -out ia.p7b -certfile CACert.crt and it didnt work either. i just get an error saying my commands are messed up.
So i apologize, but can you tell me how, exactly, to convert the file produced by your tutorial into a .p7b cert and key? Sorry, im a novice.
Joe
Comment by joe — Tuesday 22 December 2015 @ 19:31
@joe openssl crl2pkcs7 -nocrl -certfile ca.crt -out ca.p7b
Comment by Didier Stevens — Wednesday 23 December 2015 @ 12:56
Hi Didier,
I followed the commands you specified, and generated the certificate in .p7b format. But when I try to send it to my partner, I get a “OBJECT ID does not support getComponentAt(int)!” error. Any suggestions?
Joe
Comment by joe — Monday 28 December 2015 @ 17:24
@joe what do you mean, you get an error when you e-mail it as an attachment? I have no idea.
Comment by Didier Stevens — Tuesday 29 December 2015 @ 18:53
So it turns out that the mistake I am having is because I am needing a SMIME Certificate.
Comment by joe — Tuesday 5 January 2016 @ 15:40
i would like to remove the certificate and create it again any help please
Comment by Anonymous — Monday 18 January 2016 @ 10:33
just delete the files that you created when you followed the procedure the first time.
Comment by Didier Stevens — Monday 18 January 2016 @ 11:07
How to generate a certificate from a CSR
Comment by Sujith — Saturday 20 February 2016 @ 0:39
Hi, this is self signed certificate but what if you have internal CA then what will be the procedure?
Comment by Faisal Muneer Awan — Wednesday 16 March 2016 @ 7:44
Of course, all root CAs are self-signed.
Comment by Didier Stevens — Wednesday 23 March 2016 @ 19:53
[…] Howto: Make Your Own Cert With OpenSSL on Windows […]
Pingback by OpenSSL – instalace a vygenerování csr požadavku pro certifikát | Jan Ševela — Friday 27 May 2016 @ 12:48
Thanks for the assistance
Comment by DTAYL — Sunday 17 July 2016 @ 14:02
Might I suggest a page edit putting the WARNING about not using the same common name BEFORE the instruction where they error might occur? Otherwise this is great
Comment by MMinieri — Wednesday 20 July 2016 @ 23:04
Hi Didier,
Nice How-To, thank you for that.
I ‘ve follewed all instructions with succes. I ‘ve installed it on a webpage, but I receive the following message:
An error occurred during a connection to 150.16.213.252. SSL received a weak ephemeral Diffie-Hellman key in Server Key Exchange handshake message. Error code: SSL_ERROR_WEAK_SERVER_EPHEMERAL_DH_KEY
The message is clear, the SSL-key is not strong enough for Mozilla Firefox (I still have access to the webpage with Google Chrome). So we need a stronger key. How can we tell OpenSSL to generate a stronger format ?
Thansk for any feedback !
Comment by Jos De Ruyck (@deruyjo) — Friday 29 July 2016 @ 10:42
@Jos The certificate does not dictate which encryption has to be used for the TLS connection. This is determined by the settings of the server and the client. Check the settings of your webserver, you can use the Qualys’ SSL Labs to help you.
Comment by Didier Stevens — Friday 29 July 2016 @ 12:45
Hi, i am having issues with the code:
After running this: OpenSSL> req -new -key ia.key -out ia.csr
I get this Error
problem creating object tsa_policy1=1.2.3.4.1
9368:error:08064066:object identifier routines:OBJ_create:oid exists:crypto\obje
cts\obj_dat.c:689: error in req
Do you have any ideas on how to move forward?
Comment by Carl Bonifacio — Wednesday 31 August 2016 @ 9:00
Hi Carl. Are you using Windows?
Comment by Didier Stevens — Wednesday 31 August 2016 @ 11:07
Hi, i am having similar issues. I am using Windows 10, and i also get the same error at that particular step:
OpenSSL> req -new -key ia.key -out ia.csr
problem creating object tsa_policy1=1.2.3.4.1
3156:error:08064066:object identifier routines:OBJ_create:oid exists:crypto\objects\obj_dat.c:689:
error in req
Comment by Thomas — Thursday 1 September 2016 @ 7:39
Make sure you use version 1.0.2
And if you just need a simple cert, I have a tool (CreateCertGUI) that uses OpenSSL to create a cert, but you don’t need to install OpenSSL: https://blog.didierstevens.com/2016/08/08/howto-createcertgui-create-your-own-certificate-on-windows-openssl-library/
Comment by Didier Stevens — Thursday 1 September 2016 @ 8:08
Update: make sure you use version 1.0.2
Comment by Didier Stevens — Sunday 4 September 2016 @ 19:36
Hi,
Please help me….
I am having similar issues. I am using Windows 2012 r2, and i also get the same error at that particular step:
OpenSSL> req -new -key ia.key -out ia.csr
problem creating object tsa_policy1=1.2.3.4.1
3224:error:08064066:object identifier routines:OBJ_create:oid exists:crypto\objects\obj_dat.c:689:
error in req
Kind regards,
Suresh
Comment by Suresh Kumar Pondicherry — Friday 9 September 2016 @ 2:16
The problem is caused by version 1.1.0. Don’t use thise version, use version 1.0.2h.
Comment by Didier Stevens — Friday 9 September 2016 @ 5:36
Tnx! Very helpful
Comment by Slobodan Vesovic — Friday 30 September 2016 @ 10:08
Hi, is there anyway to add subject alternative names to the certificate request?
Comment by Phil — Monday 21 November 2016 @ 0:40
Yes, subjectAltName in openssl.cnf
Comment by Didier Stevens — Monday 21 November 2016 @ 22:03
Thanks but do you have any instructions on how to create a certificate with subject alternative names using the windows version, as I am only able to find instructions for the Linux version. Where do I put “subjectAltName” in “openssl.cnf” and what values do I need to enter?
Comment by Phil — Tuesday 22 November 2016 @ 1:15
That’s difficult to explain in a comment, maybe I can make a blogpost later.
Comment by Didier Stevens — Tuesday 22 November 2016 @ 19:35
That would be great if you could.. Thanks 🙂
Comment by Phil — Tuesday 22 November 2016 @ 19:38
Can I use a certificate generated with 1.0.2 with 1.1.0 DLLs’ after that? Because there are some security fixes in latter versions.
Comment by Miro — Tuesday 29 November 2016 @ 9:09
Yes
Comment by Didier Stevens — Tuesday 29 November 2016 @ 9:11
Hi Didier,
Have done everything you have listed with no issues but how do I take the csr (pem) generated by a server and sign with the ca certificate? You stopped at this point and went on with code signing instead
Comment by Anonymous — Tuesday 29 November 2016 @ 15:07
Hi, what server are you talking about?
Comment by Didier Stevens — Tuesday 29 November 2016 @ 21:15
Hello,
how to generate wildcard certificate with Intermediate/chain certificate and private key ?
Comment by Nachiket Barve — Friday 3 February 2017 @ 9:33
Here: https://www.devside.net/wamp-server/generating-and-installing-wildcard-and-multi-domain-ssl-certificates
Comment by Didier Stevens — Saturday 4 February 2017 @ 7:23
thanks didier. is there any simple method?
Comment by nachiket barve — Tuesday 7 February 2017 @ 9:00
Hi Didier – great great sutff – I used it to fix a problem caused by the latest FileZilla. I posted in https://forums.iis.net/t/1234970.aspx?FTPS+filezilla+3+24+Key+usage+violation+in+certificate+has+been+detected+ since I started there. I linked you – hope you don’t mind the reference – I needed a PFX file (so it was your last command – slightly altered) and a simple consideration in the open ssl config (You probably had covered elsewhere0. Cheers – thanks a bunch.
Comment by arnaud — Thursday 23 February 2017 @ 19:54
hi didier…i already follow step from beginning this tutorial but i stuck when to produce ca.key…the error just below
OpenSSL> genrsa -out ca.key 4096
ca.key: Permission denied
7620:error:02001005:system library:fopen:Input/output error:.\crypto\bio\bss_file.c:402:fopen(‘ca.key’,’wb’)
7620:error:20074002:BIO routines:FILE_CTRL:system lib:.\crypto\bio\bss_file.c:404:
error in genrsa
Comment by dean — Friday 21 April 2017 @ 8:53
You are in the OpenSSL folder, you don’t have rights to write in this folder.
Comment by Didier Stevens — Monday 24 April 2017 @ 9:18
tq didier…finally I success
Comment by dean — Monday 1 May 2017 @ 8:19
hi didier…how to make this certificate to pkcs8 in format PEM
Comment by dean — Thursday 4 May 2017 @ 8:44
pkcs8 format is for private keys, not for certificates. The private key is in PEM format.
Comment by Didier Stevens — Thursday 4 May 2017 @ 15:36
Very nice article, clear many things about certificate and their creation techniques using OpenSSL. But i did’t get few things like where did we create the client certificate, and the subordinate certificate will act as SSL certificate or client certificate.
Initially when i started making certificate, i used makecert.exe which i had to leave because it doesn’t have option of subject alternative name. How can we create client and SSL certificate using OpenSSL, and also how to distinguish between both while using OpenSSL.
Any help will be appreciated.
Thanks,
Manoj
Comment by Manoj Maity — Thursday 18 May 2017 @ 12:25
@Manoj With “client certificate”, do you mean a certificate installed on the client for authentication?
Comment by Didier Stevens — Saturday 20 May 2017 @ 8:09
Wow! The best cert creation and installation article. I read the instructions first, read\scan through all the comments. I went back to the article followed direction per Didier. Not a single error! I installed the certs on my internal Synology NAS (DS1817+) and my Windows 10 and I am up and running without scary SSL cert error. Note that it helps to read a step ahead or two so you understand what is going to happen once you press the enter key. 🙂 Thanks Didier Stevens!
Comment by Hiren — Friday 22 September 2017 @ 22:55
Where is the CSR generated after I do this? I did all of this and it seems to have worked but now I need the CSR. All I am trying to do is create a CSR to submit to my CA and I don’t understand why this is so hard.
Comment by Anonymous — Wednesday 27 September 2017 @ 18:25
The CSR is file ia.csr. But you should not follow this procedure to create a CSR for your CA, follow the procedure they recommend.
Comment by Didier Stevens — Wednesday 27 September 2017 @ 18:30
How do you create a certificate in pem format? I will need it for web auth and EAP-TLS authentications on a Cisco wireless controller and Cisco ISE server for my lab? Thank you, great website.
Comment by Craig Karagus — Thursday 2 November 2017 @ 13:49
This procedure creates certificates in pem format.
Comment by Didier Stevens — Friday 3 November 2017 @ 8:37
I am constantly getting error messages of the Certificate Authority not allowed to issue certificates for the Intermediate Authority. Have tried all modifications to the openssl.cfg file but it still does not work. Do you have a link to a sample config file that I could use to create the intermediate Authority. Seems like only the ones for Linux are available and not windows.
Comment by Dave — Wednesday 24 January 2018 @ 19:05
Can you post the exact commands you use and the error message you get?
Comment by Didier Stevens — Thursday 25 January 2018 @ 20:20
This is really nice.
Don’t i need a certificate for the end client/workstation for authentication or trust internal website? How do generate cert for client machines?
Comment by 27052904 — Thursday 21 June 2018 @ 19:11
No, that’s not required.
Comment by Didier Stevens — Monday 25 June 2018 @ 21:50
Hi, Many thanks for this. I’m needing to secure an internal IIS site. When i create the first rootCA.crt -the common name for this entry will not be the same as the intermediate CA right? In IIS Manager when i create the certificate request, i would have to match the common name to the Intermediate CA Common Name?
Comment by pete palomo — Monday 18 March 2019 @ 5:07
Hi Didier, thanks for detailed explanation with screenshots, this is the best available on internet.
Comment by Varun Malik — Thursday 5 September 2019 @ 6:40
In the last step, when you say ‘install file ia.p12 in your certificate store’, which store do you mean? Personal or Trusted Root Certification Authorities?
Comment by Mikhail Utkin — Tuesday 3 March 2020 @ 18:47
The store you want your certificatein. If you have no preference, take personal. Don’t take trusted root, unless you know what you are doing.
Comment by Didier Stevens — Thursday 5 March 2020 @ 19:41
Hi, is there still no fix to this error for the supported 1.1.1 versions? 3224:error:08064066:object identifier routines:OBJ_create:oid exists:crypto\objects\obj_dat.c:689:
thanks
Comment by Howard Lee — Wednesday 20 January 2021 @ 3:25
I just discovered something. This error happens when you start openssl without arguments, and then issue all the commands, just like I explained in my blog post.
However, if you launch openssl for each command, then you don’t get the error.
Like this:
openssl genrsa -out ca.key 4096
openssl req -new -x509 -days 1826 -key ca.key -out ca.crt
openssl genrsa -out ia.key 4096
openssl req -new -key ia.key -out ia.csr
I’ve tested this with different versions on Windows & Linux.
I get the error when I run openssl once and issue the different commands, and I don’t get the error when I run openssl for each command.
Update: I did more research, and this is indeed a known issue with interactive mode:
https://github.com/openssl/openssl/issues/2795
https://github.com/openssl/openssl/issues/6292
Solution: don’t use interactive mode. I’ll make new blog posts, as there are more new things that I want to highlight.
Comment by Didier Stevens — Sunday 24 January 2021 @ 13:28
[…] several things have changed since I published “Howto: Make Your Own Cert With OpenSSL on Windows” 5 years ago, I’m publishing an updated […]
Pingback by How-to: Make Your Own Cert With OpenSSL on Windows (Reloaded) | Didier Stevens — Monday 7 June 2021 @ 13:34
Hi Didier, I am getting the following error when i did a req command:
Can’t open “D:\Program Files\OpenSSL-Win64\bin\openssl.cfg” for reading, No such file or directory
C0660000:error:80000002:system library:BIO_new_file:No such file or directory:crypto\bio\bss_file.c:67:calling fopen(D:\Program Files\OpenSSL-Win64\bin\openssl.cfg, r)
C0660000:error:10000080:BIO routines:BIO_new_file:no such file:crypto\bio\bss_file.c:75:
Can you please guide how to tackle this? thanks for your time in advance
Comment by Tushar Nalawade — Thursday 28 October 2021 @ 18:30
Please use the new howto (I mention it at the top of this post): https://blog.didierstevens.com/2021/06/07/how-to-make-your-own-cert-with-openssl-on-windows-reloaded/
Comment by Didier Stevens — Saturday 30 October 2021 @ 7:47
Hi Didier
Thank you for explaining creating a self-signed certificate, much appreciated.
regards
Joseph Devaraj
Comment by Anonymous — Sunday 16 June 2024 @ 12:02