Randy Armknecht detected a malformed WMF file and put a post up over at the Security Catalyst Community (I’m a member).
My analysis will show that this WMF file doesn’t contain shellcode. I use a tool I discovered recently, the 010 Editor, a professional hex editor with binary templates. Binary templates allow you to define the structure of a binary file with a C-like scripting language. A binary file parsed with a template is much easier to understand, as you will see. Unfortunately, I found no free alternative for this tool.
There are binary templates available for many file formats on the 010 Editor site, but none for the WMF file format. So we’ll just have to make our own.
Back from the hectic days of the WMF exploit (December 2005), I remember that the WMF file is composed of a header followed by records. There are several sources of information for the WMF file format, like this one and this one.
We copy the C struct definition of the header and put it in our template. Then we tell the 010 editor that our file is in LittleEndian format (this is the case for Intel processors) and we declare that our file starts with the WMF header.

We run our template against our file:
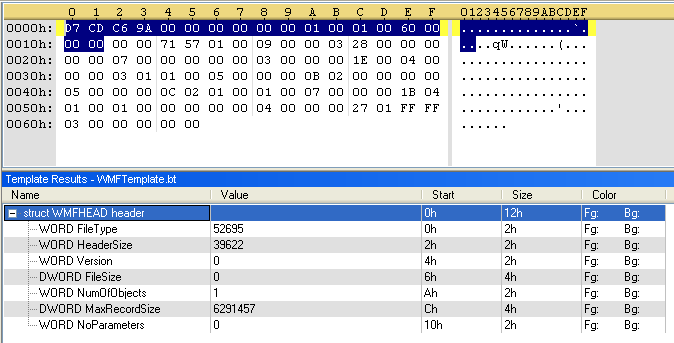
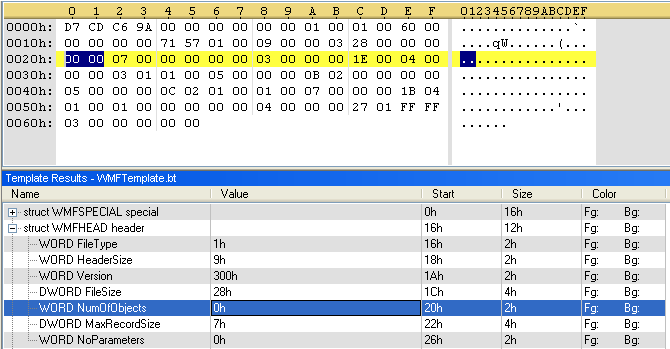
Now it’s easy to see that the values for FileType, HeaderSize and Version are not correct. Looking a bit further (22 bytes to be exact), we see the correct values for these parameters.

So let’s just assume that this WMF file has something else before the standard header, and declare that the file format is an array of 22 bytes (the unknown part), followed by the WMF header.

Let’s switch the template display to hex:

And now we see the correct values:

This is a good example of the power of binary templates: you can make them on the fly, while you are trying to understand the file format.
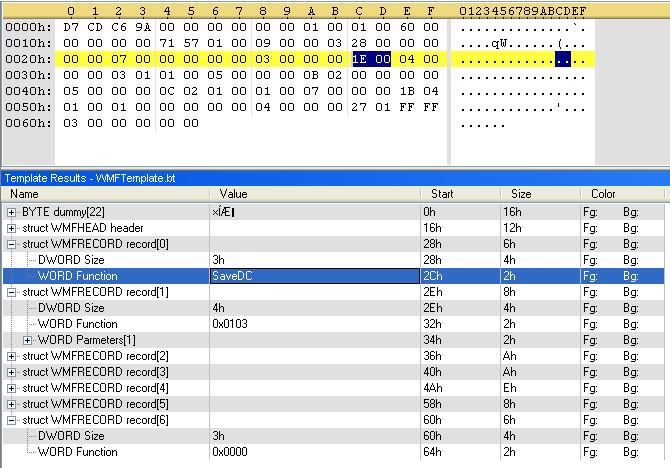
Now let’s add the WMF records. We define the structure (copied from the fileformat document), and declare the size of the Parameters array to be the Size of the record minus 3 (remember, this is not real C, but a scripting language, and thus it is very flexible, allowing dynamic array definitions).
Now we don’t need just one record, but many records, up till the end of our file. So we instruct the editor to declare records as long as it doesn’t reach the end of the file:

Here we can see the individual records, showing us that the file looks normal in this respect.

Each record has a Function. To better understand our file, we will instruct the editor to display the name of the Function instead of its number. We do this by defining a function (ReadFunction) that will lookup the meaning of the Function numbers and translate them to something meaningful. This ReadFunction is linked to the Function value with the <read=> construct.

So now we have the name of our first record:
And we add the other functions to our template:
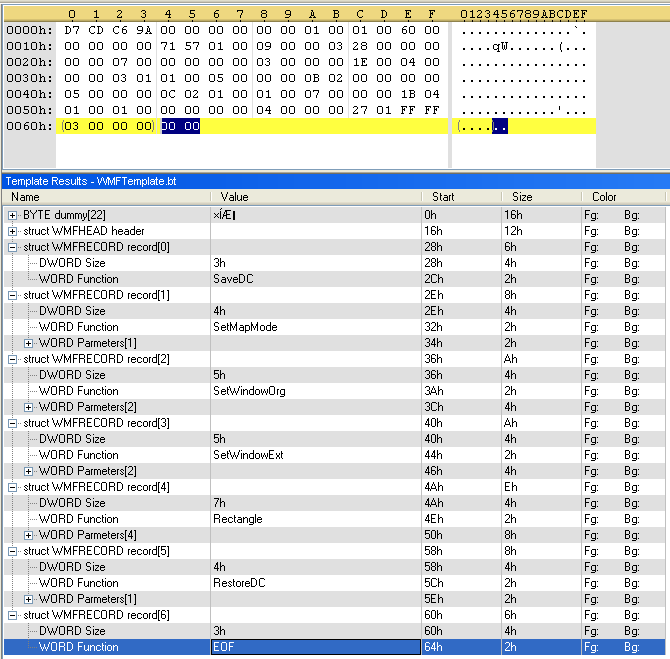
Again, the file looks normal (no infamous SetAbortProc function), and it is closed with the correct record (EOF).
Let’s go back to our first 22 bytes. Further reading in the file format documents reveals that some special WMF files (called placeable WMF files) have a special header. We include this header in our template:


This looks much better, this is indeed a special WMF file.
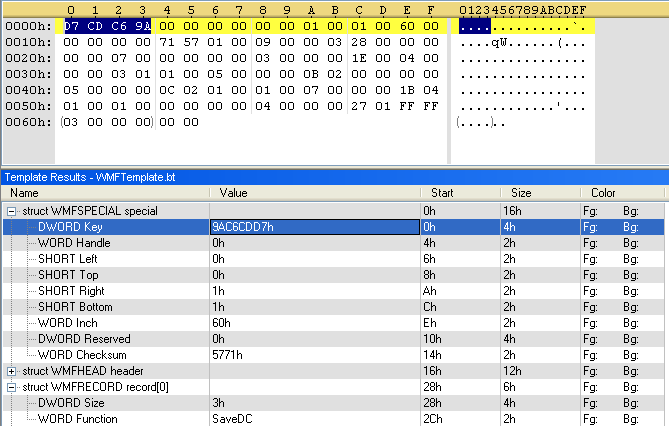
Of course, not all WMF files start with this special header. The presence of such a header is detectable by its magic byte sequence, 0x9AC6CDD7. We will make our template flexible and only declare the special header when we detect the magic byte sequence:

The checksum field in the special header is an XOR operation performed on the 10 preceding words (20 bytes). That’s also something we can script, again by defining a <read=> function:


And we can confirm that the checksum is correct:

This is how it looks when we tamper with the header (setting Reserved to 1):

The checksum is incorrect.
By building this template as we analyze the file, we are able to ascertain that the file format is normal and that the values are normal (except NumOfObjects, which should be 7 instead of 0).
So there is no place where shellcode can be hidden in this file.
BTW, we can add a function to check the NumOfObjects like this:


My template for WMF files can be downloaded here.
Now, who can tell me what is drawn by this WMF file?