I have an updated version of this how-to here: “How-to: Make Your Own Cert With OpenSSL on Windows (Reloaded)“
Some people following my “Howto: Make Your Own Cert With OpenSSL” do this on Windows and some of them encounter problems. So this post shows the procedure on Windows.
If you don’t know how to use the command-line or you don’t want to install OpenSSL to create a simple certificate, I created a tool for Windows that doesn’t require installation: CreateCertGUI.
For your info: I also have a video showing this howto.
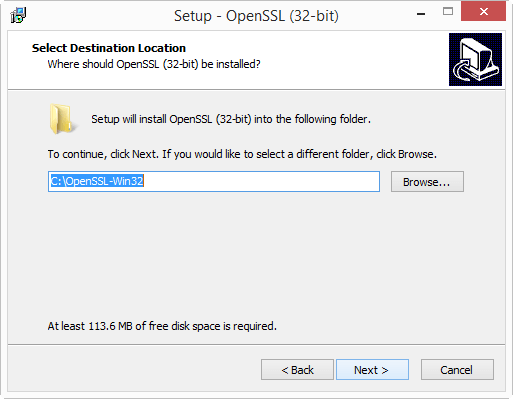
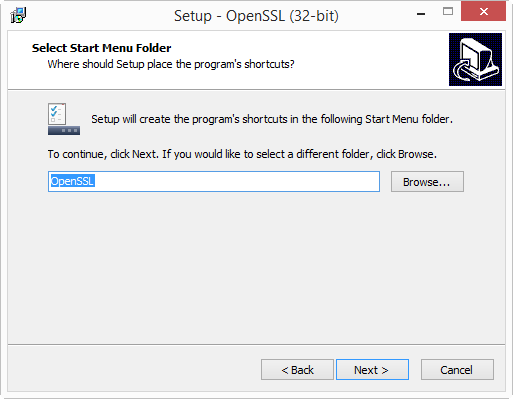
First of all, on Windows you will need to install OpenSLL from binaries. I got these binaries.
I installed the latest version (v1.0.2a) and choose the 32-bit version (Win32). I choose the 32-bit version because this will work for every Windows machine: the 32-bit version works on 32-bit and 64-bit machines.
Warning: don’t use version 1.1.0 or later, you’ll get this error: “problem creating object tsa_policy1=1.2.3.4.1”
If you start the installation and get the following message:

then you need to cancel the installation and install the Visual C++ 2008 Redistributables first. You can find download links on the same page. If you install Win32 OpenSSL (32-bit), install Visual C++ 2008 Redistributables, and if you install Win64 OpenSSL (64-bit), install Visual C++ 2008 Redistributables (x64).
The installation of the Redistributables is easy:


After this, you can restart the OpenSSL installation:


I will create the certificates in folder c:\demo. So go ahead and create this folder on your machine.
Then start a command-line prompt (cmd.exe), and go to the demo folder (type: cd \demo).
Before you start OpenSSL, you need to set 2 environment variables:
set RANDFILE=c:\demo\.rnd
set OPENSSL_CONF=C:\OpenSSL-Win32\bin\openssl.cfg

Now you can start OpenSSL, type: c:\OpenSSL-Win32\bin\openssl.exe:

And from here on, the commands are the same as for my “Howto: Make Your Own Cert With OpenSSL”.
First we generate a 4096-bit long RSA key for our root CA and store it in file ca.key:
genrsa -out ca.key 4096

If you want to password-protect this key, add option -des3.
Next, we create our self-signed root CA certificate ca.crt; you’ll need to provide an identity for your root CA:
req -new -x509 -days 1826 -key ca.key -out ca.crt

The -x509 option is used for a self-signed certificate. 1826 days gives us a cert valid for 5 years.
Next step: create our subordinate CA that will be used for the actual signing. First, generate the key:
genrsa -out ia.key 4096

Then, request a certificate for this subordinate CA:
req -new -key ia.key -out ia.csr

Make sure that the Common Name you enter here is different from the Common Name you entered previously for the root CA. If they are the same, you will get an error later on when creating the pkcs12 file.
Next step: process the request for the subordinate CA certificate and get it signed by the root CA.
x509 -req -days 730 -in ia.csr -CA ca.crt -CAkey ca.key -set_serial 01 -out ia.crt

The cert will be valid for 2 years (730 days) and I decided to choose my own serial number 01 for this cert (-set_serial 01). For the root CA, I let OpenSSL generate a random serial number.
That’s all there is to it! Of course, there are many options I didn’t use. Consult the OpenSSL documentation for more info. For example, I didn’t restrict my subordinate CA key usage to digital signatures. It can be used for anything, even making another subordinate CA. When you buy a code signing certificate, the CA company will limit its use to code signing. And I did not use passwords to protect my keys. In a production environment, you want to protect your keys with passwords.
To use this subordinate CA key for Authenticode signatures with Microsoft’s signtool, you’ll have to package the keys and certs in a PKCS12 file:
pkcs12 -export -out ia.p12 -inkey ia.key -in ia.crt -chain -CAfile ca.crt

If you did not provide a different Common Name for the root CA and the intermediate CA, then you’ll get this error:
Error self signed certificate getting chain.
error in pkcs12
To sign executables in Windows with the signtool: install file ia.p12 in your certificate store (e.g. double click it), and then use signtool /wizard to sign your PE file.
The certificates (.crt files) you created here can also be double-clicked in Windows to view/install them:

