I already used a Teensy to send a CONTROL keypress every 10 seconds. This came in handy to keep machines from going to sleep or auto-locking.
Today I wrote a script for my Bash Bunny to do the same.
Warning: if you use this, make sure you unplug the Bash Bunny before you start typing on the computer. Otherwise the CONTROL keypresses will interfere with your typing, potentially ending up in unwanted commands like CTRL-Q: Quit
#!/bin/bash
# Title:         Infinite Control
# Author:        Didier Stevens (https://DidierStevens.com)
# Version:       0.0.1 2017/04/08
#
# Hit the CONTROL key every 10 seconds in an infinite loop,
# while blinking the red LED with every keypress.
#
# Can be used to prevent a machine from sleeping or auto-locking.
#
# WARNING: Do not type on the machine's keyboard while this script
#          is running, or your keystrokes might become commands,
#          for example CTRL-Q: Quit
#
# Red ...............Hitting CONTROL key
# Red Blinking.......Wow! We broke out of the infinite while loop!

ATTACKMODE HID

# infinite while loop
while true
do
  LED R
  QUACK CTRL
  LED
  sleep 10
done

# this code will never be reached
LED R 100
After setting up my Bash Bunny, I used it on a locked Windows 10 machine to get netNTLMv2 hashes, here is the video:
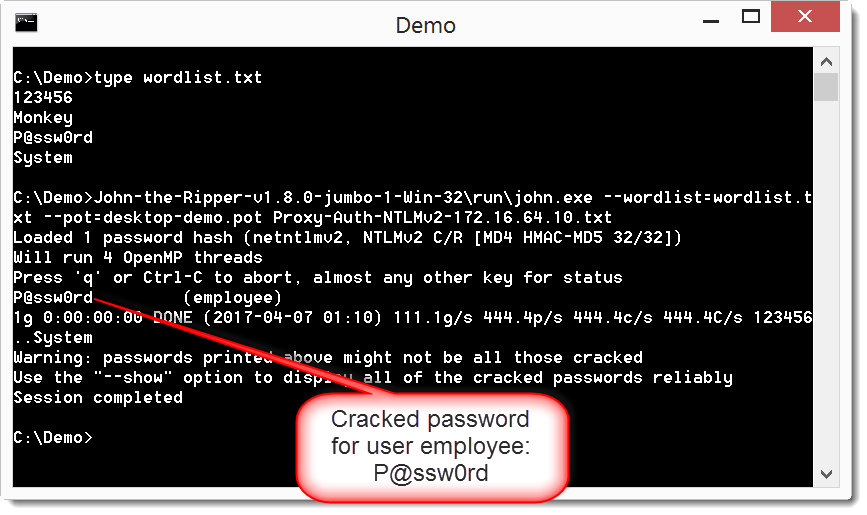
After collecting the hashes, I can recover them from the Bash Bunny:
I put my Bash Bunny into arming mode: put the switch in position 3 (switch position closest to the USB connector). I insert my Bash Bunny in my Windows machine. The removable storage on the Bash Bunny gets assigned drive letter D: on my machine.
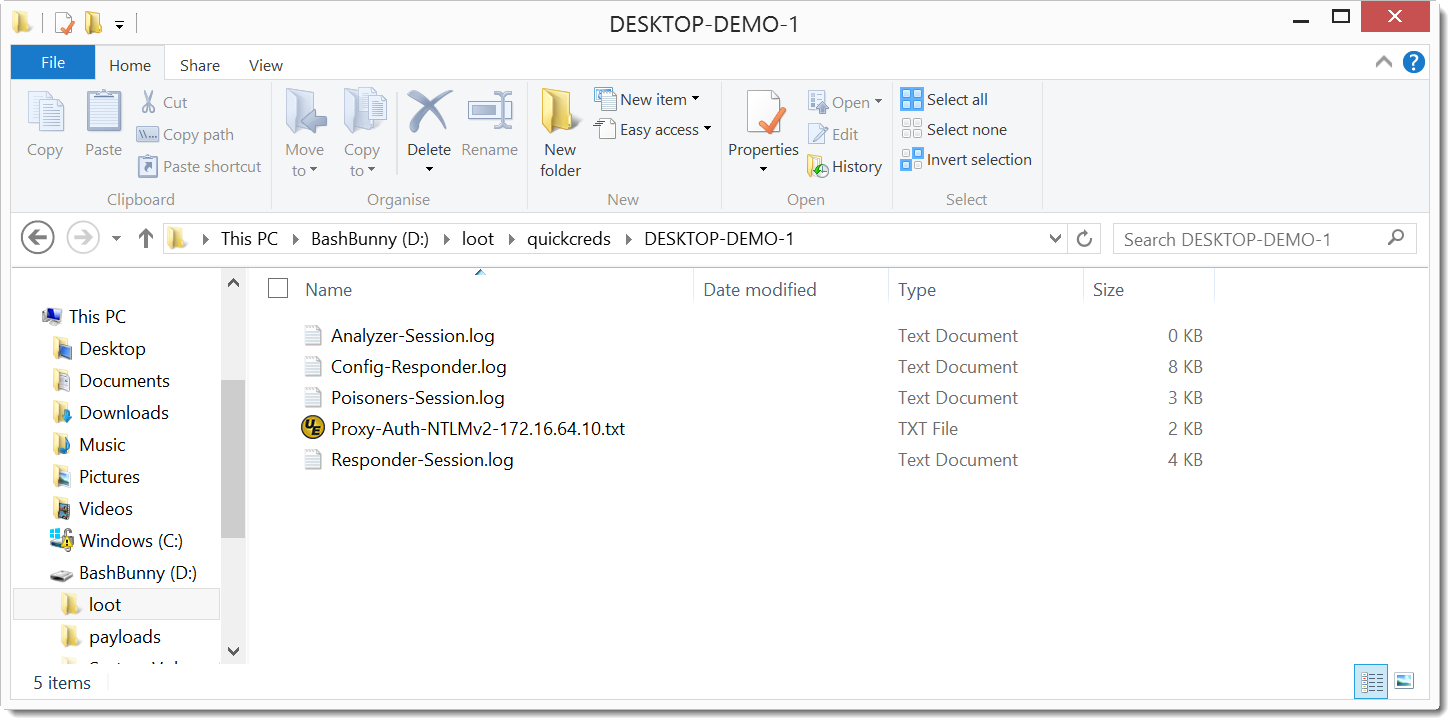
Inside folder D:\loot\quickcreds there are folders created each time I use this payload on a machine. Here is the content for the Windows 10 machine I collected hashes from (DESKTOP-DEMO):
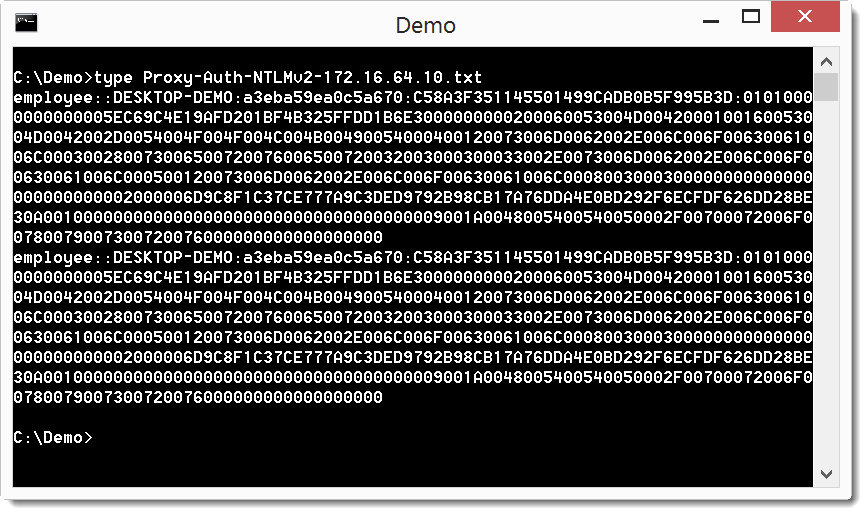
File Proxy-Auth-NTLMv2-172.16.64.10.txt contains the hashes:
Here is what I did to setup my Bash Bunny after unboxing it:
First I updated the payloads on my Bash Bunny from the GitHub repository.
I put my Bash Bunny into arming mode: put the switch in position 3 (switch position closest to the USB connector). I insert my Bash Bunny in my Windows machine. The removable storage on the Bash Bunny gets assigned drive letter D: on my machine.
I copy the content of the GitHub repository payloads folder to the payloads folder on the Bash Bunny: d:\payloads\ (overwriting existing files).
To install the tools: I copy D:\payloads\library\tools_installer\ to D:\payloads\switch1\ (overwriting existing files).
I eject the Bash Bunny, put the switch in position 1 (payload 1, switch position closest to the LED). I insert the Bash Bunny in my Windows machine, and wait for a white solid LED: this takes about 10 seconds.
I eject the Bash Bunny, put the switch in position 3 and re-insert it into my Windows machine.
Then I set the QuickCreds payload (responder) as payload 2 on my Bash Bunny: copy D:\payloads\library\QuickCreds\ to D:\payloads\switch2\ (overwriting existing files).
I eject the Bash Bunny, put the switch in position 2 (payload 2, switch position in the middle) and insert it into my test Windows machine. After some time, the Bash Bunny displays a green LED, indicating that hashes were collected.
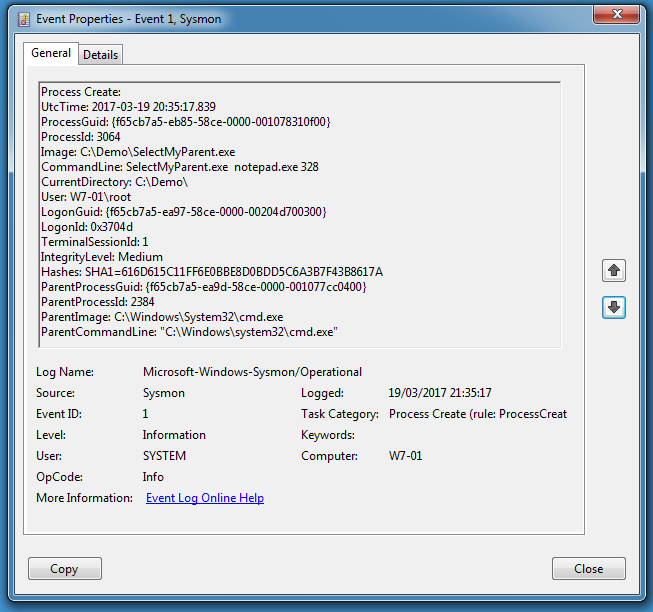
Years ago I released a tool to create a Windows process with selected parent process: SelectMyParent.
You can not blindly trust parent-child process relations in Windows: the parent of a process can be different from the process that created that process.
Here I start selectmyparent from cmd.exe to launch notepad.exe with parent explorer.exe (PID 328):
Process Explorer reports explorer.exe as the parent (and not selectmyparent.exe):
Process Monitor also reports explorer.exe as the parent:
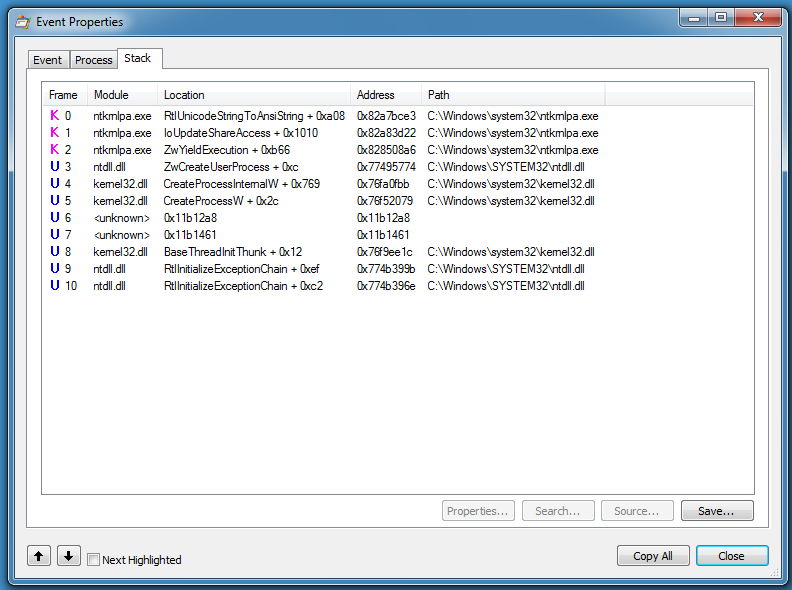
If we look in the call stack of the process creation of notepad.exe, we see 2 frames (6 and 7) with unknown modules:
We should see entries in the call stack for explorer.exe if notepad.exe was started by explorer.exe, but we don’t.
The <unknown> module is actually selectmyparent.exe.
0x11b1461 is the address of the instruction after the call to _main in ___tmainCRTStarup in selectmyparent.exe.
0x11b12a8 is the address of the instruction after the call to CreateProcessW in _main in selectmyparent.exe.
System Monitor also reports explorer.exe as the parent:
Finally, Volatility’s pstree command also reports explorer.exe as the parent:
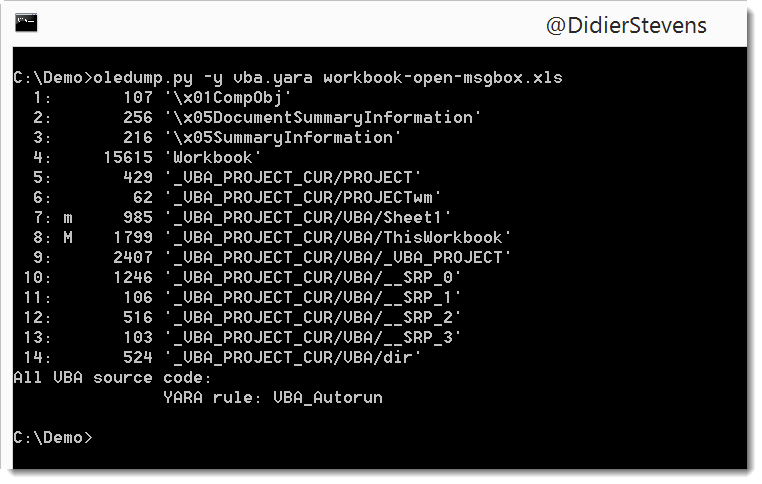
This new version of oledump.py adds some extra features for YARA rule scanning.
oledump.py declares 2 external variables that can be used in your YARA rules.
External variable streamname is a string with the stream name, as printed in oledump’s report.
External variable VBA is a boolean that is set to true when the data to scan is VBA source code. Previous versions of oledump would scan the raw stream content with YARA, but this new version also decompresses all streams with VBA macros, and concatenates them together to scan them after all streams have been scanned.
It’s a tool I started years ago, and I’m releasing it now.
sets.py allows you to perform operations on sets: union, intersection, subtraction and exclusive or. A set is a list of lines in a file, or a stream of bytes in a file.






 Didier Stevens