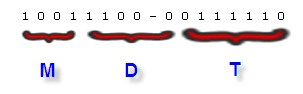
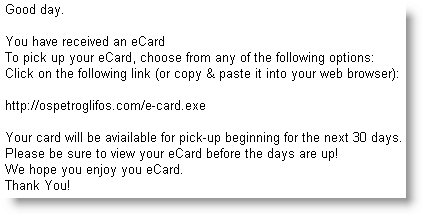
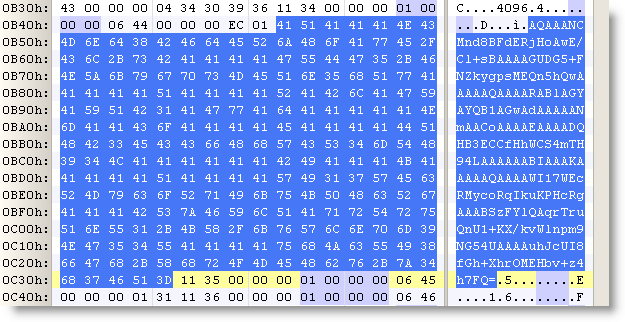
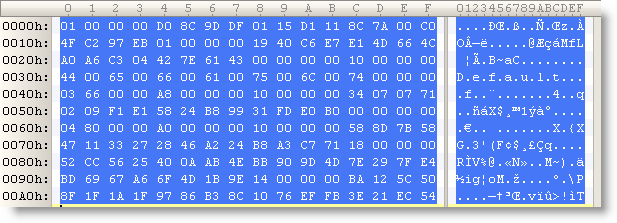
A quiz question for today: what is CALL -151?
Shout-outs to everyone who ever used CALL -151!
Update:
The answer:

A quiz question for today: what is CALL -151?
Shout-outs to everyone who ever used CALL -151!
Update:
The answer:

Last weekend, I’ve been playing with a RC servo to automate the recording of wsrradial plots. Metlstorm has presented a solution to do this with Lego Mindstorms, but I present a solution if you don’t want to use Lego components.
RC servos are easy to find, and you can find many servo controllers for PCs (a typical RC servo is controlled with a PWM signal). Though most RC servos though are limited to 180° rotations, there are 360° servos on the market.
Here is a picture of my 360° RC servo, togheter with a servo controller.

The servo in action:
I’m starting a couple of posts with detailed explanations and solutions for my Authenticode Challenge. Let’s start with a solution using standard tools.
If you’re a bit into cryptography, you know that the textbook attack on RSA public-key cryptography is integer factorization. Long keys are used to thwart this attack, because no efficient method has been found to factor large integers within an acceptable time and cost. While researching Authenticode, I asked myself this question: assume you’ve solved the factorization problem, how exactly would you forge a new digital signature for a patched executable?
I worked out a method, and then got the idea to turn this into a difficult puzzle for you, i.e. a real challenge. But to do that, I had to find a way to make the integer factorization a non-issue for the puzzle. My first solution, using a very small key, was a dead-end. First the key had to be large enough to allow me to generate a certificate (about 360 bits long), but then the signcode procedure didn’t work. I figured out that the key had to be at least 512 bits for Authenticode to work. But a 512 bits key would take too long to factorize… Read on to find out how I solved this.
Solution 1
This solution takes mostly place on a Linux box. The first thing we have to do is recover the private key…
1) Get the authenticode challenge file ac.exe
2) Extract the PKCS7 Authenticode signature with my digital signature tool:
disitool.py extract ac.exe ac.exe.pkcs7
3) Dump the information in the pkcs7 file with openssl:
openssl pkcs7 -in ac.exe.pkcs7 -inform DER -text -print_certs > ac.exe.pkcs7.text

The public key is composed of the Modulus and the Exponent.
4) Lets extract the modulus from the certificate with this command:
openssl x509 -modulus -in ac.exe.pkcs7.text
Modulus=D0EA1ABA978DF0065B2009F75C846F28B04ED5143B237B3FC24272245ADE837EFE0271E1A2854E0C81BA9F70A83AD86D47B0EACD062BC15BC61A99DC83124EC9
The modulus N is an integer that is the product of 2 prime numbers, P and Q (P and Q are kept secret). Integer factorization will allow you to recover P and Q, and hence produce the private key. There are several algorithms and tools to factorize integers, I’ll just point you to a didactic cryptography tool I mentioned before: Cryptool. But because I’m using a 512 bit modulus, factorization will take a long time, and I wanted to avoid this. So lets do something else.
5) Convert the modulus from a hexadecimal representation to a decimal representation, for example with Python:
python -c 'print 0xD0EA1ABA978DF0065B2009F75C846F28B04ED5143B237B3FC24272245ADE837EFE0271E1A2854E0C81BA9F70A83AD86D47B0EACD062BC15BC61A99DC83124EC9'
The modulus N in decimal representation is:
10941738641570527421809707322040357612003732945449205990913842131476349984288934784717997257891267332497625752899781833797076537244027146743531593354333897
6) Search for this number with Live Search (Google will not accept such a large search term):

To spare you the long factorization time, I used a 512 bit key that has already been factorized: RSA-155 (this is the first 512 bit key to be factorized and was a landmark result in integer factorization).
Thus we have:
P = 102639592829741105772054196573991675900716567808038066803341933521790711307779
Q = 106603488380168454820927220360012878679207958575989291522270608237193062808643
Next post will explain in detail how to use P and Q to generate a new Authenticode signature…
It’s silly to post this now, but I forgot to mention in my YAISC post that I wouldn’t post my cartoons in this feed.
Today I’m starting a new experiment. I wonder if I’ll be funny enough to entertain you.
Mr. P and Q has solved my Authenticode Challenge. You can download his solution here, I copied his howto here below. I’ll add my own details in an upcoming post, but in the meantime, be sure to do a web search for the modulus.
What you need: An internet connection A windows system A CPP compiler OpenSSL installed Step 1: Export the certificate used by Didier from ac.exe to didier.cer Select AC.EXE, Right click properties, Digital Signatures tab, "Details button", "View Certificate" button,Details tab, "Copy to File" button, select the "DER encoded binary X.509(.CER)" option and export to didier.exe Step 2: Use OpenSSL to extract the modulus of the certificate used OpenSSL>x509 -modulus -inform DER -in didier.cer Step 3: Use OpenSSL to convert didier's certificate in PEM format (for later use) OpenSSL>x509 -inform DER -in didier.cer -outform PEM -out didier.pem Step 4: Copy the modulus extracted in step2 into FindPQ.cpp, build the application, execute and (wait ... wait ... wait ...) ^1000 or download http://www.boo.net/~jasonp/msieve.exe. Start msieve msieve -v -n 0xD0EA1ABA978DF0065B2009F75C846F28B04ED5143B237B3FC24272245ADE837EFE0271E1A2854E0C81BA9F70A83AD86D47B0EACD062BC15BC61A99DC83124EC9 and (wait ... wait ... wait ...)^100 until it finally displays: prp78 factor: 102639592829741105772054196573991675900716567808038066803341933521790711307779 prp78 factor: 106603488380168454820927220360012878679207958575989291522270608237193062808643 Step 5: Create a 'real' RSA key so we can re-sign the modified ac.exe (remember the first part of this challenge) Copy the two factors found(step 4) into CreatePEM.cpp, build the application and excute. The application will produce newkey.pem Step 6: Use OpenSSL to combine newkey.pem and didier.pem (step3) into a PKCS12 keyfile (you will need to provide a password of your choice) OpenSSL>pkcs12 -export -in didier.pem -inkey newkey.pem -out magic.p12 Step 7: Import magic.p12 into your Windows system Simply double click magic.p12 select all the default options specify the password you defined in Step 6 when asked. Step 8: Download signcode https://www.thawte.com/dynamic/en/images/support/inetSDk5.zip unzip Step 9 Start signcode, select the modified ac.exe, select the "Didier" key and you're done ... Good luck Mister P and Q.
Slugs are versatile little machines. I installed Slugos on my NSLU2, followed by the tools I used in my sampling video.
Unfortunately, it’s too small for my sticker 😉

When I access it with SSH, I see no difference with a shell account on a regular machine.
My Python programs work unmodified, and I can compile my C programs like SpiderMonkey.
As a virus lab, it has a couple of advantages:
For an Howto:
Installing Slugos as per these instructions.
Installing a C compiler (not essential for a virus lab):
Installing the Optware feed as per these instructions.
Installing the Optware toolchain:
Linking /usr/bin/python to the python2.5 executable
Now if I could just get my hands on a small biohazard sticker…
![]()
Ever noticed a list of exotic animals (Poweroyster, Firebadger, Hypnotoad, …) in your web site visitors list (user-agent strings)?
One of your visitors certainly uses the Firesomething Firefox add-on!
My search for a radial WiFi plotting tool was unsuccessful, so a coded my own: wsrradial.py.
It’s easy to record activity in the 2.400–2.500 GHz ISM spectrum with a Wi-Spy adapter and a directional antenna. Here’s my 9 dBi Yagi antenna:

One low-tech way to quantify the electromagnetic radiation around you goes like this: point the Yagi antenna in one direction for 1 minute, then turn it 45° and repeat the procedure, until you’ve completed a full circle. Use wsrradial to generate radial plots of the recording made with Chanalyzer. It’s configured by default for 8 measurements (360° divided by 45°) of 1 minute each, but command-line options allow you to choose your own parameters.
The following radial plot shows the average amplitude for each sampled frequency. The frequency is set out on the radial axis (the lowest frequency is closest to the center, the highest is the most distant), the angular coordinate is just the orientation of the directional antenna. Amplitude is hue color-coded.
This was recorded a couple of meters away from an active access point operating at 2.432 GHz. You can clearly see that the access point is situated in the upper-left corner.
The second plot generated by wsrradial shows the maximum amplitude instead of the average amplitude. I believe this plot gives a better picture of nearby transmitters.
I tried to use matplotlib to generate the charts, but was only able to generate the same charts Chanalyzer produces. So I coded my own chart plotting routines with the Python Image Library. If you know how to use matplotlib to make radial spectrum plots, let me know.
FYI: my latest little puzzle showed an average amplitude plot of the same recording, but with an older version of my program featuring an easier to code color map.