Didier Stevens

Tuesday 30 December 2008

Howto: Make Your Own Cert With OpenSSL

Filed under: Encryption — Didier Stevens @ 21:18

Update: if you don’t have access to a machine with OpenSSL, I created a website to generate certs using the procedure described here. Read through the procedure, and then use the website listed at the end. And if you don’t want your private key generated on a server you don’t own, download my tool I created for Windows that doesn’t require installation: CreateCertGUI.

I also made a video showing the full procedure.

Ever wanted to make your own public key certificate for digital signatures? There are many recipes and tools on the net, like this one. My howto uses OpenSSL, and gives you a cert with a nice chain to your root CA.

First we generate a 4096-bit long RSA key for our root CA and store it in file ca.key:

openssl genrsa -out ca.key 4096

Generating RSA private key, 4096 bit long modulus
...................................................................................++
........................................................................++
e is 65537 (0x10001)

If you want to password-protect this key, add option -des3.

Next, we create our self-signed root CA certificate ca.crt; you’ll need to provide an identity for your root CA:

openssl req -new -x509 -days 1826 -key ca.key -out ca.crt

You are about to be asked to enter information that will be incorporated
into your certificate request.
What you are about to enter is what is called a Distinguished Name or a DN.
There are quite a few fields but you can leave some blank
For some fields there will be a default value,
If you enter '.', the field will be left blank.
-----
Country Name (2 letter code) [GB]:BE
State or Province Name (full name) [Berkshire]:Brussels
Locality Name (eg, city) [Newbury]:Brussels
Organization Name (eg, company) [My Company Ltd]:https://DidierStevens.com
Organizational Unit Name (eg, section) []:
Common Name (eg, your name or your server's hostname) []:Didier Stevens (https://DidierStevens.com)
Email Address []:didier stevens Google mail

The -x509 option is used for a self-signed certificate. 1826 days gives us a cert valid for 5 years.

20081230-220030

Next step: create our subordinate CA that will be used for the actual signing. First, generate the key:

openssl genrsa -out ia.key 4096

Generating RSA private key, 4096 bit long modulus
.....++
.............................................................................++
e is 65537 (0x10001)

Then, request a certificate for this subordinate CA:

openssl req -new -key ia.key -out ia.csr

You are about to be asked to enter information that will be incorporated
into your certificate request.
What you are about to enter is what is called a Distinguished Name or a DN.
There are quite a few fields but you can leave some blank
For some fields there will be a default value,
If you enter '.', the field will be left blank.
-----
Country Name (2 letter code) [GB]:BE
State or Province Name (full name) [Berkshire]:Brussels
Locality Name (eg, city) [Newbury]:Brussels
Organization Name (eg, company) [My Company Ltd]:https://DidierStevens.com
Organizational Unit Name (eg, section) []:Didier Stevens Code Signing (https://DidierStevens.com)
Common Name (eg, your name or your server's hostname) []:
Email Address []:didier stevens Google mail

Please enter the following 'extra' attributes
to be sent with your certificate request
A challenge password []:
An optional company name []:

Next step: process the request for the subordinate CA certificate and get it signed by the root CA.

openssl x509 -req -days 730 -in ia.csr -CA ca.crt -CAkey ca.key -set_serial 01 -out ia.crt

Signature ok
subject=/C=BE/ST=Brussels/L=Brussels/O=https://DidierStevens.com/OU=Didier Stevens Code Signing (https://DidierStevens.com)/emailAddress=didier stevens Google mail
Getting CA Private Key

The cert will be valid for 2 years (730 days) and I decided to choose my own serial number 01 for this cert (-set_serial 01). For the root CA, I let OpenSSL generate a random serial number.

That’s all there is to it! Of course, there are many options I didn’t use. Consult the OpenSSL documentation for more info. For example, I didn’t restrict my subordinate CA key usage to digital signatures. It can be used for anything, even making another subordinate CA. When you buy a code signing certificate, the CA company will limit its use to code signing.

20081230-220418

To use this subordinate CA key for Authenticode signatures with Microsoft’s signtool, you’ll have to package the keys and certs in a PKCS12 file:

openssl pkcs12 -export -out ia.p12 -inkey ia.key -in ia.crt -chain -CAfile ca.crt

Enter Export Password:
Verifying - Enter Export Password:

To sign executables in Windows with the signtool: install file ia.p12 in your certificate store (e.g. double click it), and then use signtool /wizard to sign your PE file.

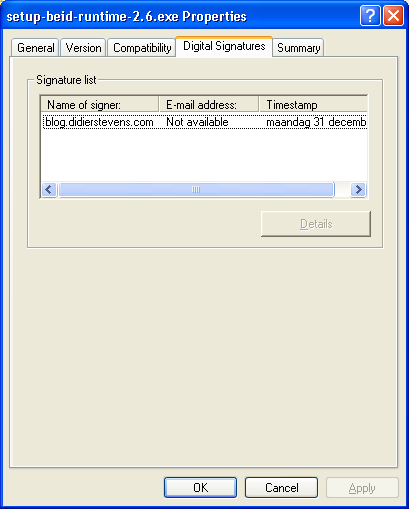
I’ve used this process to generate certs for my own code signing, and for my Authenticode Challenge.

Update: don’t have OpenSSL? Use my website https://toolbokz.com/gencert.psp

Monday 29 September 2008

Quickpost: SQL Server 2005 Management Studio and Password Management

Filed under: Encryption,Quickpost,Reverse Engineering — Didier Stevens @ 16:06

Another stored password question I was asked: where does SQL Server 2005 Management Studio store the passwords, and are they encrypted?

When you set the Remember Password toggle:

the password is saved in this file (default install, Administrator account):
C:\Documents and Settings\Administrator\Application Data\Microsoft\Microsoft SQL Server\90\Tools\Shell\mru.dat

The password is not stored in cleartext. The file contains a BASE64 blob, strongly resembling a DPAPI protected data blob.

Convert it to hex:

(all the protected DPAPI data blobs I’ve seen start with byte sequence 01 00 00 00 D0 8C 9D…)

Let’s decode this with CryptUnprotectData (all optional parameters set to NULL):

We get no error, proving that it’s indeed data protected by DPAPI on this machine for this user. The content is just the password in UNICODE.

The nice thing for a software developer, is that DPAPI allows him to encrypt/decrypt data without having to worry about encryption keys. For details on all the keys used by DPAPI, read this MSDN article.


Quickpost info


Friday 26 September 2008

Quickpost: Stored User Names and Passwords

Filed under: Encryption,Quickpost — Didier Stevens @ 19:05

“Where does Windows store this password?” “Is it safe there?”

I regularly get asked these questions, and they frequently appear on forums.

Microsoft has developed several technologies to store and protect credentials, and to add to the confusion, Microsoft has renamed some of these technologies over the years…

A list: LSA, Protected Storage, Windows Data Protection (DPAPI), Stored User Names and Passwords, …

Last question I read was: where does runas /savecred store the password? It gets stored in Stored User Names and Passwords. Before storing the password:

And after:

Nirsoft has a tool (CredView) to dump passwords stored in Stored User Names and Passwords:

The CredRead function (used by CredView) will not retrieve Windows passwords (domain and local) unless it is called from the LSA process. That’s why CredView doesn’t display the testrunas password (data).

If you convert CredView to a DLL and inject it in the LSA process, you’ll be able to retrieve the passwords. This is exactly what Cain & Abel does, and why you need admin rights (SeDebugPrivilege to be precise).


Quickpost info


Wednesday 17 September 2008

Authenticode Challenge – Solution Part 1

Filed under: Encryption,Puzzle — Didier Stevens @ 23:07

I’m starting a couple of posts with detailed explanations and solutions for my Authenticode Challenge. Let’s start with a solution using standard tools.

If you’re a bit into cryptography, you know that the textbook attack on RSA public-key cryptography is integer factorization. Long keys are used to thwart this attack, because no efficient method has been found to factor large integers within an acceptable time and cost. While researching Authenticode, I asked myself this question: assume you’ve solved the factorization problem, how exactly would you forge a new digital signature for a patched executable?

I worked out a method, and then got the idea to turn this into a difficult puzzle for you, i.e. a real challenge. But to do that, I had to find a way to make the integer factorization a non-issue for the puzzle. My first solution, using a very small key, was a dead-end. First the key had to be large enough to allow me to generate a certificate (about 360 bits long), but then the signcode procedure didn’t work. I figured out that the key had to be at least 512 bits for Authenticode to work. But a 512 bits key would take too long to factorize… Read on to find out how I solved this.

Solution 1

This solution takes mostly place on a Linux box. The first thing we have to do is recover the private key…

1) Get the authenticode challenge file ac.exe

2) Extract the PKCS7 Authenticode signature with my digital signature tool:

disitool.py extract ac.exe ac.exe.pkcs7

3) Dump the information in the pkcs7 file with openssl:

openssl pkcs7 -in ac.exe.pkcs7 -inform DER -text -print_certs > ac.exe.pkcs7.text


The public key is composed of the Modulus and the Exponent.

4) Lets extract the modulus from the certificate with this command:

openssl x509 -modulus -in ac.exe.pkcs7.text

Modulus=D0EA1ABA978DF0065B2009F75C846F28B04ED5143B237B3FC24272245ADE837EFE0271E1A2854E0C81BA9F70A83AD86D47B0EACD062BC15BC61A99DC83124EC9

The modulus N is an integer that is the product of 2 prime numbers, P and Q (P and Q are kept secret). Integer factorization will allow you to recover P and Q, and hence produce the private key. There are several algorithms and tools to factorize integers, I’ll just point you to a didactic cryptography tool I mentioned before: Cryptool. But because I’m using a 512 bit modulus, factorization will take a long time, and I wanted to avoid this. So lets do something else.

5) Convert the modulus from a hexadecimal representation to a decimal representation, for example with Python:

python -c 'print 0xD0EA1ABA978DF0065B2009F75C846F28B04ED5143B237B3FC24272245ADE837EFE0271E1A2854E0C81BA9F70A83AD86D47B0EACD062BC15BC61A99DC83124EC9'

The modulus N in decimal representation is:
10941738641570527421809707322040357612003732945449205990913842131476349984288934784717997257891267332497625752899781833797076537244027146743531593354333897

6) Search for this number with Live Search (Google will not accept such a large search term):

To spare you the long factorization time, I used a 512 bit key that has already been factorized: RSA-155 (this is the first 512 bit key to be factorized and was a landmark result in integer factorization).

Thus we have:

P = 102639592829741105772054196573991675900716567808038066803341933521790711307779

Q = 106603488380168454820927220360012878679207958575989291522270608237193062808643

Next post will explain in detail how to use P and Q to generate a new Authenticode signature…

Sunday 7 September 2008

Mister P and Q’s Excellent Solution

Filed under: Encryption,Hacking,Puzzle — Didier Stevens @ 15:49

Mr. P and Q has solved my Authenticode Challenge. You can download his solution here, I copied his howto here below. I’ll add my own details in an upcoming post, but in the meantime, be sure to do a web search for the modulus.


What you need:
An internet connection
A windows system
A CPP compiler
OpenSSL installed

Step 1:
Export the certificate used by Didier from ac.exe to didier.cer
Select AC.EXE, Right click properties, Digital Signatures tab, "Details button", "View Certificate" button,Details tab, "Copy to File" button, select
the "DER encoded binary X.509(.CER)" option and export to didier.exe

Step 2:
Use OpenSSL to extract the modulus of the certificate used
OpenSSL>x509 -modulus -inform DER -in didier.cer

Step 3:
Use OpenSSL to convert didier's certificate in PEM format (for later use)
OpenSSL>x509 -inform DER -in didier.cer -outform PEM -out didier.pem

Step 4:
Copy the modulus extracted in step2 into FindPQ.cpp, build the application, execute and (wait ... wait ... wait ...) ^1000
or download http://www.boo.net/~jasonp/msieve.exe.
Start msieve
msieve -v -n 0xD0EA1ABA978DF0065B2009F75C846F28B04ED5143B237B3FC24272245ADE837EFE0271E1A2854E0C81BA9F70A83AD86D47B0EACD062BC15BC61A99DC83124EC9
and (wait ... wait ... wait ...)^100 until it finally displays:
prp78 factor: 102639592829741105772054196573991675900716567808038066803341933521790711307779
prp78 factor: 106603488380168454820927220360012878679207958575989291522270608237193062808643

Step 5:
Create a 'real' RSA key so we can re-sign the modified ac.exe (remember the first part of this challenge)
Copy the two factors found(step 4) into CreatePEM.cpp, build the application and excute.
The application will produce newkey.pem

Step 6:
Use OpenSSL to combine newkey.pem and didier.pem (step3) into a PKCS12 keyfile (you will need to provide a password of your choice)
OpenSSL>pkcs12 -export -in didier.pem -inkey newkey.pem -out magic.p12

Step 7:
Import magic.p12 into your Windows system
Simply double click magic.p12 select all the default options specify the password you defined in Step 6 when asked.

Step 8:
Download signcode
https://www.thawte.com/dynamic/en/images/support/inetSDk5.zip
unzip

Step 9
Start signcode, select the modified ac.exe, select the "Didier" key and you're done ...

Good luck
Mister P and Q.

Wednesday 23 January 2008

Quickpost: The Digital Signature of a Cryptographic Service Provider

Filed under: Encryption,Quickpost — Didier Stevens @ 9:43

This post is the result of additional research started by this comment. A Cryptographic Service Provider (CSP) must be digitally signed by Microsoft before it can be installed and used on Windows. But this digital signature is technically very different from AuthentiCode and serves another goal.

AuthentiCode uses digital certificates, a certificate is a digitally signed document which links a public key to an identity. Code signing is performed to link software to its author and to allow detection of program alteration. AuthentiCode is also used by Microsoft to digitally sign device drivers. In this case, the signature is used to show that the driver passed Microsoft’s testing program (the signer is Microsoft Windows Hardware Compatibility Publisher)

A CSP must also be signed by Microsoft, but the technique is different from AuthentiCode. Microsoft will sign the hash of the CSP. This signature can be stored inside the file as a resource (ID 0x29A or 666) that is 144 bytes long, or inside the registry as a blob of 136 bytes. When I looked at several signatures inside CSPs, I noticed that the first 8 bytes were almost always identical and hence are probably not part of the actual signature (144 – 8 = 136).

Since the length of the signature is constant and very short, it cannot be a certificate. Neither can it be decoded as a certificate. My educated guess is that this signature is nothing more than the cryptographic hash of the file encrypted with a private key kept by Microsoft. Checking the signature is thus done in Windows by calculating the hash of the file, decrypting the signature with the public key and comparing the hash with the decrypted signature. Equality shows that the signature is valid. The use of the cryptographic hash ensures that is virtually impossible to modify the file while keeping the same hash, and the use of the private key guards the hash from forgery.

This is an example of the signature inside CSP rsaenh.dll viewed with the free XN Resource Editor:

666-resource.png

A signature for a CSP can only be obtained by providing documents to Microsoft promising to obey various legal restrictions and giving valid contact information. Thus the goal of the signature is to proof that Microsoft and the CSP author promise to obey the restrictions on cryptography. But I’m not a lawyer, the formulation of this goal is the result of my inadequate legal skills.

I was also told that Microsoft will perform some testing, but I haven’t yet received confirmation or details about this.


Quickpost info


Friday 11 January 2008

The Case of the Missing Digital Signatures Tab

Filed under: Encryption — Didier Stevens @ 9:07

The title of this post is inspired by Mark Russinovich‘s posts. I explain why there is a category of executables with a digital signature that don’t show a “Digital Signatures” tab in the properties dialog, and I release a tool to manipulate digital signatures.

Executables (PE files) can have a digital signature, Microsoft calls this signature AuthentiCode. There are 2 different ways to sign a PE file: by adding a digital signature to the PE file (embedded digital signature) or by adding a hash of the PE file to a security catalog file (filetype .CAT).

The Properties dialog of a file hosts a Digital Signatures tab when the PE file has an embedded digital signature, like this Windows patch from Microsoft:

patch-properties.png

But when a file is signed via a security catalog file, the Digital Signatures tab is not displayed. Notepad is a good example:

notepad-properties.png

To check the digital signature of this category of files, one uses Microsoft’s signtool or Mark’s sigcheck utility:

notepad-signcheck.png

These tools will calculate the hash of the file, look it up in the appropriate security catalog file and check the signature of the security catalog file. One can find security catalog files in directory C:\windows\system32\catroot:

sp2-cat-tab1.png

sp2-cat-tab2.png

For an embedded digital signature, the location of the signature is at the end of the signed file. Look for DATA_DIR Security in IMAGE_DATA_DIRECTORIES of the optional PE header. It has a pointer (4 bytes) to the signature and the length (4 bytes) of the signature. The pointer is just the offset in the binary file. When these bytes are all zero (0x00), the PE file has no embedded digital signature.
Here is the PE header of another Windows patch:

pe_header.png

In this patch, the signature entry can be found at offset 0xF4E00 in the file and is 0x2428 bytes long:

der-signature.png

The first 4 bytes of the signature entry is the size, the following 4 bytes is a constant (0x00020200), and the rest is the PKCS7 signature. This signature can be extracted with a binary editor and parsed with openssl:

openssl.png

Finally, I wrote a small Python program to manipulate embedded digital signatures. Features of disitool:

  • delete a signature: disitool.py delete signed-file unsigned-file
  • copy a signature: disitool.py copy signed-source-file unsigned-file signed-file
  • extract a signature: disitool.py extract signed-file signature
  • add a signature: disitool.py add signature unsigned-file signed-file

Monday 31 December 2007

How Can I Trust the BeID Runtime?

Filed under: Encryption — Didier Stevens @ 10:57

As a Belgian citizen, the federal government issued me an electronic ID (eID). It’s essentially a smart card with personal data, my picture (jpeg) and a couple of X.509 certificates for authentication and digital signing.

One of its applications is authentication on web sites. And this is already possible now, provided I’ve a smart card reader and I install the necessary software provided by the federal government.

Now take a look at the properties of the Windows setup file for the eID client software:

beid-properties.png

Now I expect to see something here, but it’s missing. Do you miss it too? Here’s a hint:

beid-properties-authenticode.png

That’s right, the installation program is not digitally signed (AuthentiCode). Neither are any of the executables installed by the installation program.

I’m surprised that the government invests in a PKI to issue IDs to all its citizens, yet it doesn’t deem it necessary to invest in a delivery mechanism that certifies the origin and integrity of the client software.

Sunday 23 December 2007

Quickpost: Retrieving an SSL Certificate

Filed under: Encryption,Quickpost — Didier Stevens @ 9:37

I recently had to inspect the SSL certificate of an e-mail provider (secure POP connection) . Here is a quick HOWTO using the Google Mail website as an example.

Issue this command on a box with openssl:

openssl s_client -connect mail.google.com:443 > google

Then cancel the command with CTRL-C.

A base64 representation of the web site’s certificate will be included in the output you redirected to the google file:

20071223-openssl-output.png

To inspect the certificate with openssl, use this command:

openssl x509 -in google -text

20071223-openssl-text.png

Or convert it to a certificate in DER format and open it on a Windows box:

openssl x509 -in google -outform DER -out google.der

20071223-certificate.png

« Previous Page

Blog at WordPress.com.